By Andrew Mefferd
I use a lot of tools and supplies in keeping up with my hoophouse crops. Some of them are very specialized and some are re-purposed. Here’s a look in my tool bag.
Harvest tools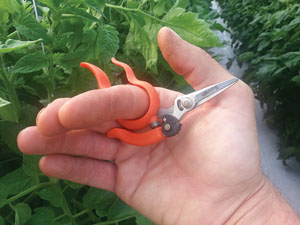
For harvesting I like having some of the curved grape and tomato shears on hand. We don’t use them so much to reach around and harvest fruit while attached to the vine as advertised, but to clip the stems after they’ve been harvested. We leave the calyx on our large-fruited tomatoes, for nice presentation and to show that they’re fresh. But sometimes we want to pick two layers deep into a black bulb crate, instead of putting them in a single layer in a flat. The stem where the fruit was attached to the vine would puncture the fruit on the top layer but we can use the curved shears to clip the stem off flush with the top of the fruit. Straight shears would leave a sharp edge on the stem from the angle you have to reach in and cut it off, so the curved ones offer a distinct advantage for this use.
Speaking of clippers, my new favorite tools are the line of Saboten harvest scissors. Hida Tool and Hardware Company features tools from Japan “that continue the metalworking traditions of the samurai sword makers.” They carry three models of the Saboten harvest scissor, along with an interesting catalog of other farm, woodworking and kitchen tools. I was initially drawn to these clippers because of their very small size; I thought they would be good for harvesting and pruning in tight spaces inside the canopy of plants. They did prove to be great for this. Since they are smaller than your hand, they can go in tight spaces without disturbing what is around them. The ergonomics are great, they are intuitive and feel very natural to use.
My favorite ended up being the model 1318 compact harvest scissors, because of the way they are designed to fit in the palm of your hand while using them, and they can be worn like a ring when you are doing other jobs with your hands. I particularly like this feature for jobs where I need to switch back and forth between using my hands and using a cutting tool. When trellising and pruning tomatoes, for example, I go back and forth between putting on clips, popping off suckers and cutting off foliage. It may not seem like a big deal but having to pick up and put down a tool hundreds of times in a day is one of those things that eats away at efficiency. Another nice feature is the safety, which keeps the scissors closed while using your hands, and is released with a quick flick of the thumb.
The high carbon steel blades are very sharp and make a cleaner cut than most clippers. The only downside that I have found is that the blades rust very quickly when left with plant juice on them in the warm, humid greenhouse environment. The blades are spring loaded so that when the safety is off, they pop open ready to cut. When they get rusty they don’t pop open so well.
So like most things, if you want to keep them functioning well give them some TLC, wipe off the plant juice when done, oil them occasionally, and maybe don’t leave them in the greenhouse. There is a very similar model to the 1318 called the B-2 which has an extra fine cutting blade tips, which don’t make a big difference to me but might if you were cutting delicate flower stems or something else really small. There is another model 1315 that has a heavier blade than the 1318 or the B-2 but it’s a little less compact and you can’t work the safety with your thumb, you have to use your other hand to release, which I didn’t like as much. So if you want to clip like a samurai, get some Saboten harvest scissors.
Trellising
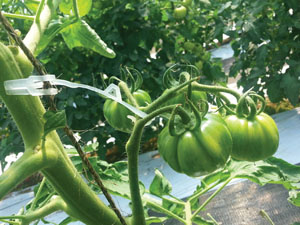
Tomato trellis clips are more useful than simply for keeping tomatoes growing up a string, though they are great at that. There are several different designs that are basically a ¾” plastic ring with a hinge on one side and a latch on the other. They are sold in the open position, ready to snap on any vining crop that you want to grow up a string, like tomatoes, cucumbers, peppers, or eggplants, for example.
The latch keeps the clip securely attached to whatever you clip it to, and has a little tab on the latch so the clip can be opened back up after it is closed and repositioned or re-used. The hinge is large enough to accommodate a string the size of plastic or sisal baler twine. The interior of the hinge holds the clip where you want it to stay on the string, and keeps the plant from flopping over as it grows upwards. As the plant grows upwards, keep adding clips to keep it upright.
Clips come in several different colors of plastic and biodegradable options. I personally like the biodegradable option, because I am wary of reusing most supplies year-to-year in a greenhouse lest disease from one year survive to haunt you the next year. Even with sanitation there is a risk that some didn’t get sanitized properly or that a pathogen survived on a piece of crud, and wouldn’t that be a tragedy to see last year’s diseases show up on your brand new crop?
Currently, the biodegradable clips cost more than the regular old plastic ones, but hopefully as the biodegradable ones become more common the price will come down. Another notable advantage of the biodegradable clips is that if you use biodegradable twine, the whole crop can be cut down, twine, clips and all at the end of the season and composted. It takes a surprising amount of time to take the clips back off at the end of the season. You may be able to save in labor the extra money you shell out up front for compostable clips.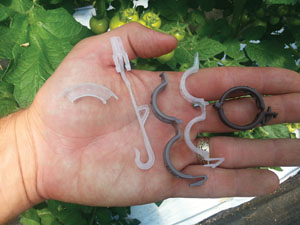
I don’t know about you but most farmers I know spend more on labor than supplies and this is one area where you may be able to save some labor money by spending a little more on supplies. Plus, in the hot, high UV greenhouse environment I’ve noticed that the plastic clips only last a season or two anyway, and may be prone to failure in successive years. Even if the plastic ones are a cent and a half each and the compostable ones are more like three, the karma you get from composting is priceless.
We have developed a signaling system using these clips, so hoophouse workers can flag potential problems. When a hoophouse worker spots a potential problem with a plant, they put a clip on the string a foot or two above the plant with the problem, so there is a clip hanging in space not anchoring anything. Since there is no other reason to put a clip there, that has become our symbol for “assess this plant carefully before working on it,” in my hoophouses.
Bright flagging tape would be even more eye-catching than a clip, but clips are what we are walking around with when we are doing plant maintenance so this doesn’t slow us down to go get flagging tape. The most common reason we do this is if a vining plant has lost its head or has a damaged head, it is an indicator to the next person who works on the plant to leave a sucker or two from which to develop a new head. We may also put a clip above a plant that is showing signs of disease, as a signal not to work on that plant and then spread the disease to other plants, and make the plant easier to find and monitor. Or if I’m not around, my workers may flag a plant that has some miscellaneous condition that they don’t know how to deal with, so later we can quickly identify the problem plants and figure out how to deal with them.
We don’t always use them, but when we notice that our tomato plants have particularly weak stems on the fruit clusters, we sometimes use truss supports. There are two main forms of truss supports: the arched truss support and the J-hook. Arched truss supports look like a miniature plastic bridge that is snapped onto the truss where it comes off of the main vine. The arched type is usually used on smaller tomatoes from grapes and cherries up to cluster tomatoes. Because the clusters on these smaller types of tomatoes are never as heavy as beefsteaks, all that is needed to keep them from kinking is a little support to keep the stem in a proper arch.
Beefsteaks, on the other hand, can pull so hard on the stem that the most common way of supporting them is to attach them directly to the trellis string. This is done with J-hooks that have the appropriately named hook on one end and a clip for attaching to the trellis string on the other end. They are used by slipping the J-shaped end of the hook under the stem of the first or second fruit on the cluster, and clipping the other end of the hook directly to the trellis string. This is done when the fruit are small before they have begun to exert much downward force on the vine.This can be particularly important when the crop is young or any other time when the plants tend to be very vegetative and produce weak, spindly fruit stems. We have had heirloom beefsteaks get so large with the stems so weak that they have actually ripped off the plant!
Even if they don’t rip off of the plant, a heavy load of tomatoes on a thin truss stem will most likely kink the stem. Some growers think this is a big problem and some don’t, but if the stems are so thin in relation to the fruit load that there is any danger of ripping off, it might be worth putting on some truss supports—especially when you consider that the first few clusters are your earliest and likely most valuable fruits. If this problem occurs, it is usually just the first few clusters that are affected the most and once the plant settles down and becomes more balanced the stems will be better formed. For more on weak trusses and plant balancing, see the June/July GFM article on vegetative/generative steering.
Some people swear by them and some never use them but if you’re having trouble with tomatoes damaging their own stems you might consider trying some truss supports. The other issue that can sometimes occur is that the kink in a fruit stem can provide an entry point for pathogens in greenhouses that are having disease problems.
Ergonomics
For keeping all these small tools handy and easily accessible while working and staying hands-free, I like using carpenters nail pouches that you can get at the hardware store. Just tie them around your waist like a belt and they hold enough clips or whatever to keep you busy for a while. Since they are made of canvas, they can be laundered and sanitized as they get dirty or come in contact with pathogens.
It’s not just because my Mom is a librarian that I like having a library kick stool in my hoophouse. For jobs that only require me to be a little taller, I really like the kick stool because I can push it down the aisle with my foot as I move along maintaining the crop and never have to stop what I’m doing to move it. The one I have is about 16” tall, made of plastic and very light. Spring-loaded wheels in the base push the whole structure up an inch or two off the ground when there is no weight on it. As soon as I put weight on it, the springs are compressed, the base makes contact with the ground and stabilizes the whole thing. The fact that the base is wider than the top which you stand on makes it more stable than, say, a bucket which I have also used with less satisfaction.
For taller jobs we have a couple of stepladders. The top wire in my hoophouses is at nine feet so lowering and leaning and other jobs that require us to work at the tippy top take a little more than the kick stool. It seems like most of the stepladders in the six foot range will get us up there and fit comfortably in our walkways which technically are four feet wide but more like two feet or less once the plants grow out into them.
For close to the ground work, we have come to appreciate the “garden buddy” type of planting carts that are designed to provide a mobile seat and toolbox in the garden. We have a few different ones, one metal with pneumatic tires and a tractor-style seat and some others that are more like boxes with wheels. In addition to sitting on them to make lowdown jobs like deleafing and harvesting less backbreaking, we have found we can bungee a bulb crate or other harvest container to the top of one and push it with our feet up the aisle as we harvest, so we don’t have to pick up our bounty every time we move along the row.
A few basics
I always keep some duct tape handy, because in addition to everything else it can fix, it can patch up a tomato vine! In the past when we have accidentally snapped tomato vines when lowering and leaning or otherwise handling them, we have had almost 100% success at taping them back together with duct tape. I have heard that if the vine snaps completely off with no attachment left this won’t work but every time we have broken them they have been at least hanging by a thread and this has always worked.
As quickly as possible after a tomato plant is snapped, line the vine back up as it was before it broke and wrap the stem below the break with tape. Wrap in a spiral up from the encircled area to contain the break entirely in duct tape and continue on a few inches above the break so the “cast” is supported on both side of the break by healthy vine and duct tape. It may help to put a J-hook or other small piece of clean material by the break to act as a stiffening “splint.” Even on hot days when I was sure a broken stemmed plant was going to be a goner this has worked well and we have saved all the plants we have snapped. I’m sure it sets them back some but it’s better than no plant at all. One time when I couldn’t find the duct tape I used electrical tape successfully but duct tape definitely works better with its greater width and stickiness.
I always keep a spray bottle with some rubbing alcohol handy. As a certified organic grower, I figure my best offense against disease in the hoophouse is a good defense. Whenever I touch a plant part that is obviously diseased or a dirty area like the floor with my hands or a tool, I spray them off and feel confident that I’m not spreading the disease from plant to plant after that. This is especially important when doing a job like deleafing below the flower cluster, where you are at a higher than average chance of coming into contact with lower leaves that may be growing botrytis or other diseases. It doesn’t do any good to cut out infected plant parts if you just move the infection on down the row! There is a disinfectant used in the livestock industry called Virkon which is effective against tomato mosaic virus and some other viruses if that is a concern, but I’m not sure whether it conflicts with organic certification to use it on tools. So as always, check with your certifier first! The greenhouse industry has pruning shears that are connected by a tube to a bottle of disinfectant, so that every time the pruners are squeezed disinfectant is sprayed on the blade. I have never needed these, I just try to keep a clean house but if you need them they are out there!
The last and most important tool I’d like to focus on is fingers, my tool of preference for any job that I can possibly do with my bare hands. It’s usually faster to use the tools you were born with than anything else. For example I always try to snap suckers off with my hands rather than cutting them. When I can do it in the morning while the plants are turgid, suckers usually pop off cleanly and I don’t have to fool with a knife.
I hope this gives you a few new ideas to try this year to improve efficiency and the quality of work done in your hoophouse.
Andrew Mefferd runs One Drop Farm in Cornville, Maine, with his wife, Ann, and does variety trialing for Johnny's Selected Seeds at the research farm in Albion, Maine.


 Last month I wrote about
 Why two of our hoophouses are named because of Emily
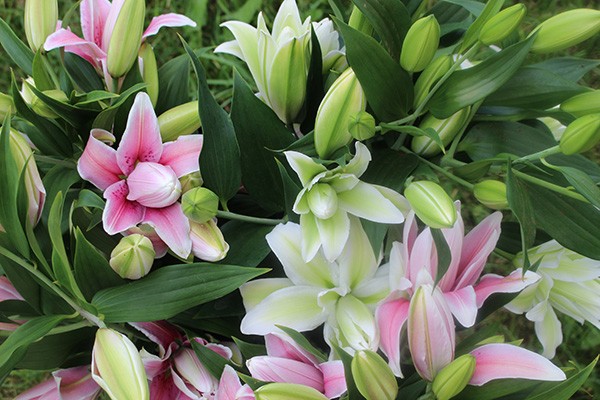 As soon as we start driving our routes in the spring our customers ask us when we’ll have roselilies. They’re that popular and have become a signature crop for us. They’re basically a type of oriental lily, but with multiple layers of petals, and without stamens and pistils (i.e. no pollen!).

 In the hoophouse plants grow bigger and faster. We want to avoid anything that slows growth down. All that growing burns up the organic matter and nutrients in the soil at a fast rate, particularly in hot, humid climates. We need to replenish the soil more generously and more often than we do outdoors. Good soil health means having enough plant nutrients, not surplus. If you have too much soluble nitrogen (N), it can leach into the groundwater or burn up the organic matter. Using manure or compost for a nitrogen source can cause the build-up of excess phosphorus (P).
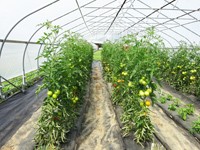
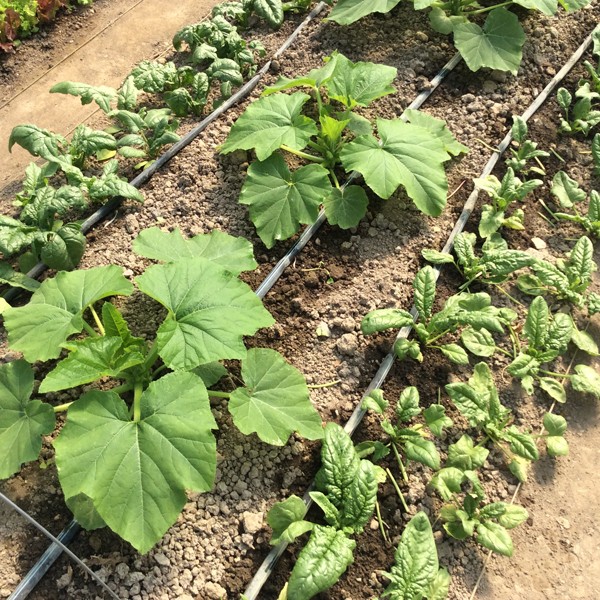 We have three main seasons in our zone 7 central Virginia hoophouse: fall-winter (October to March), spring-early summer (March to July) and high summer (August and September). We grow one bed (90’/27.5 m or so) each of yellow squash and bush cucumbers in the spring-summer season, for reliable early harvests and to help with crop rotation. If you farm in a colder climate than ours, you might be questioning allocating the precious real estate to a crop that so quickly goes from desirable to over-abundant, especially when there are more profitable things to give the space to. One reason is a difference between southern and northern climates.
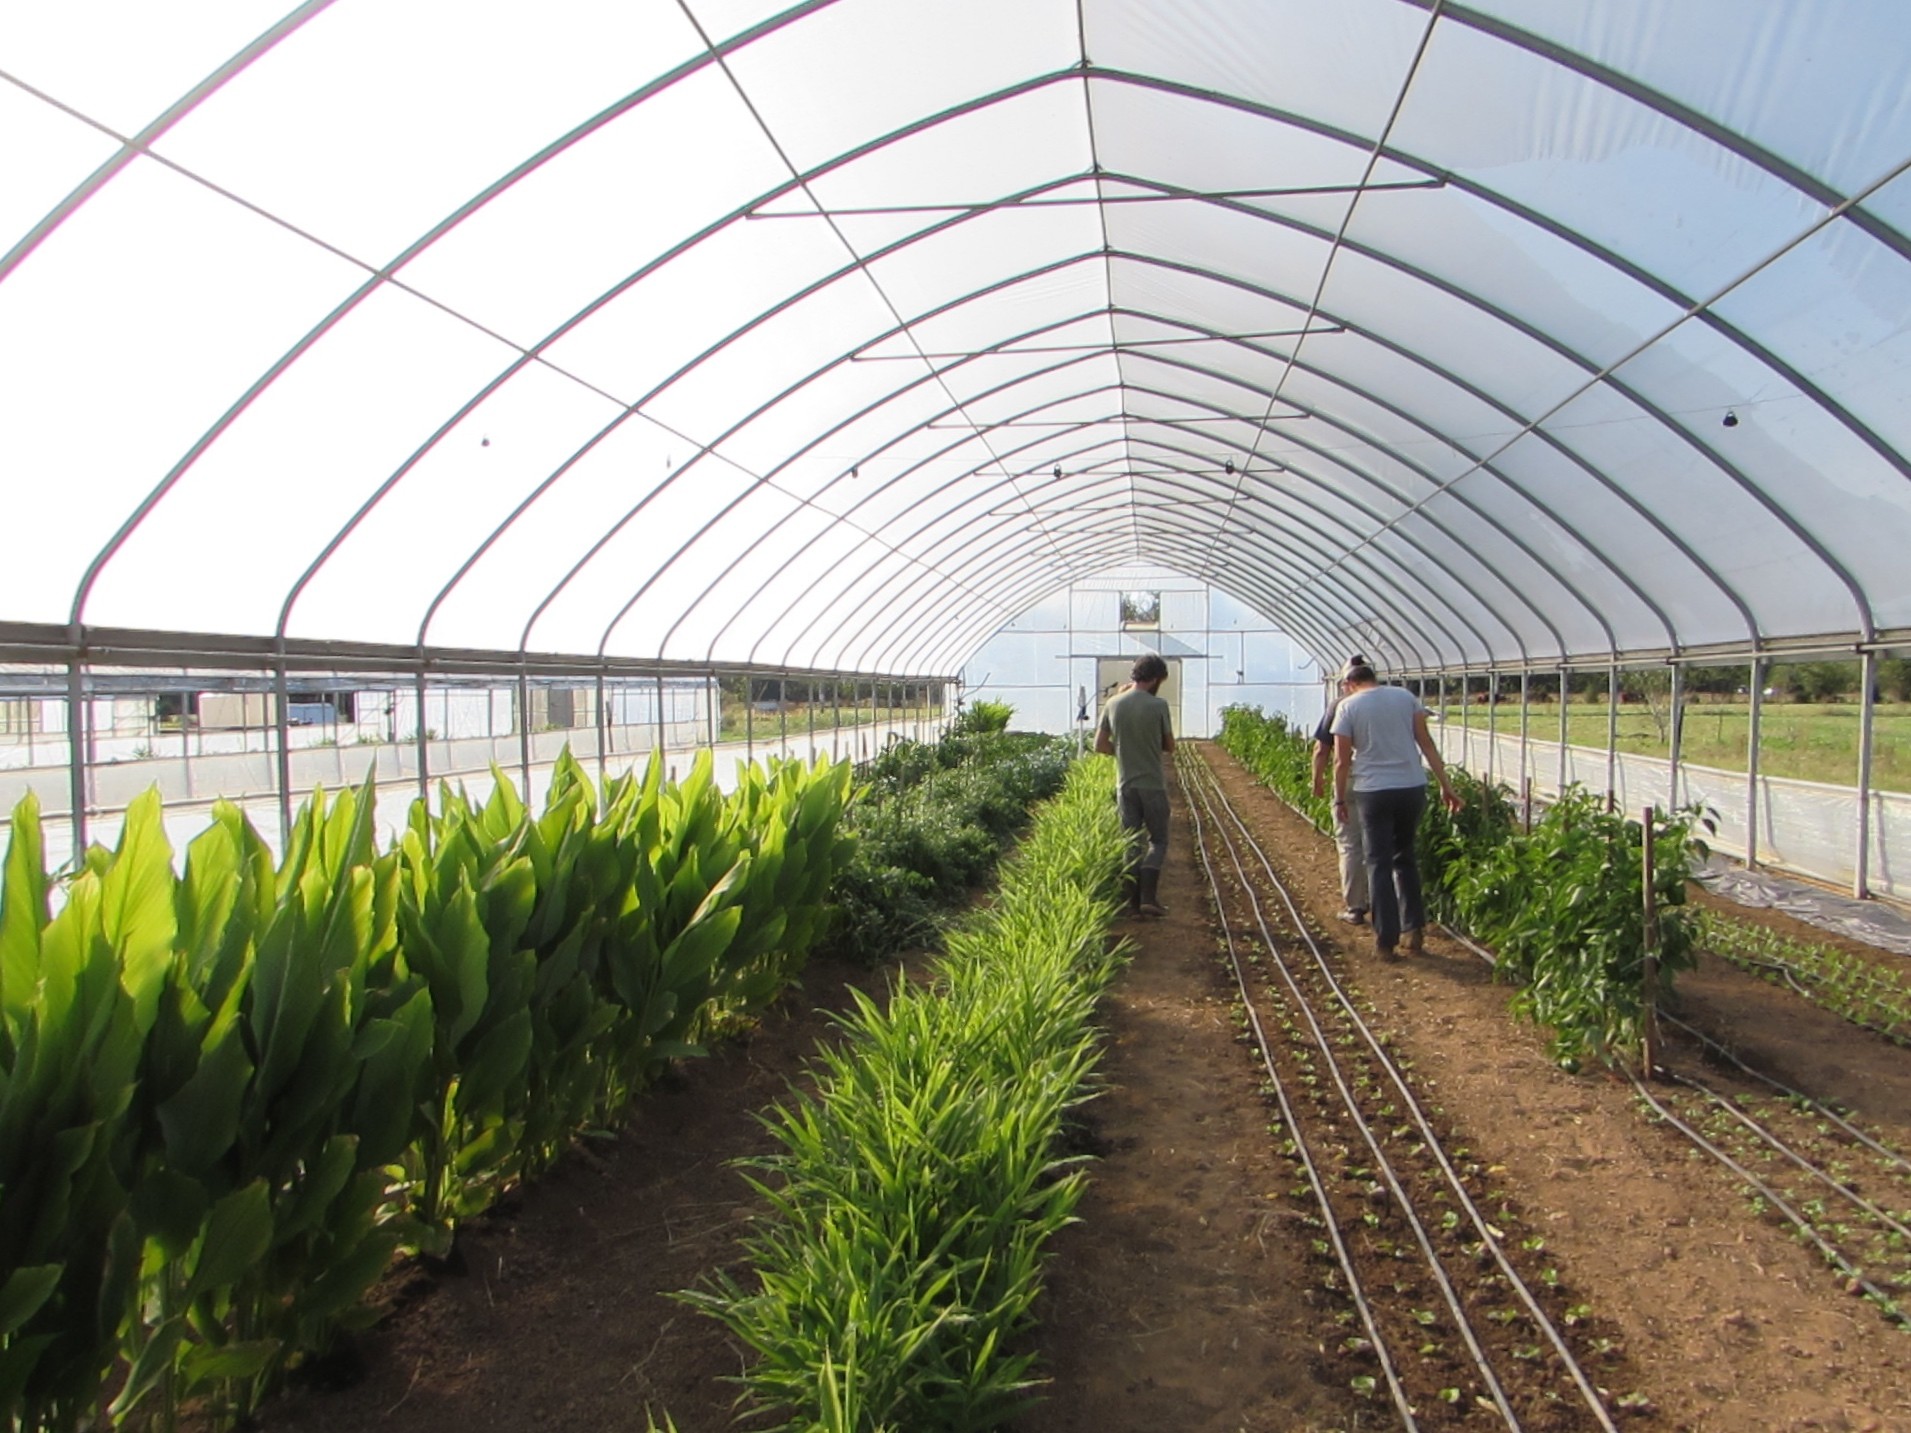
 Local and organic ginger is a high-value crop that in the right market can be in high demand. Growing this tropical crop in the Midwest can be a challenge, and thus far, farmers thought they had to own a high tunnel to ensure adequate heat during the variable spring and fall seasons. High tunnel space on most farms is at a premium, so it is expensive space to devote to a long-season crop.
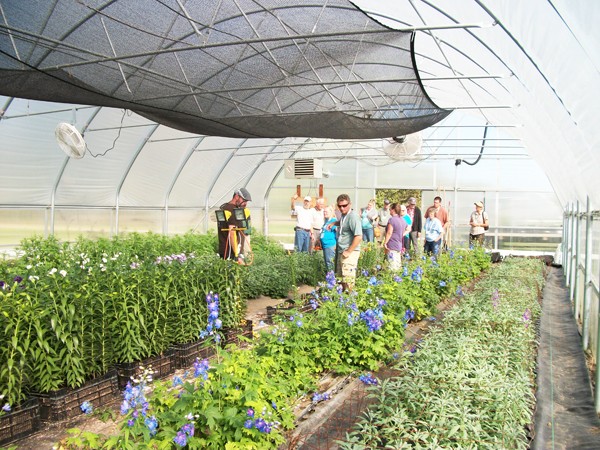
 With protected space on the farm at a premium, we have to choose wisely when deciding which crops are worth putting under cover. We start out by deciding what to grow overall, and then deciding how much of that can fit inside structures, by doing a little revenue and profit analysis. Quickbooks is used to record sales, so it’s easy to list sales per item at the end of the year to see what brought in the most revenue. A version of that report extracted to a spreadsheet calculates profit per square foot by first subtracting the costs of plugs or bulbs, and then dividing by the cultivated area for each item.
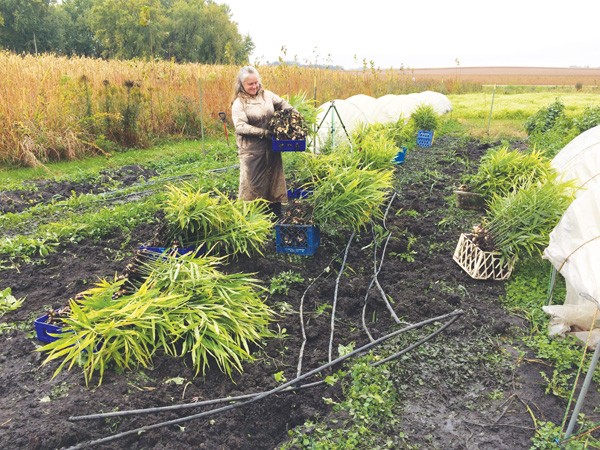
 Prairie Garden Farm has been growing cut flowers for florists and studio designers since 2010. As we’re on an exposed hillside in west-central Minnesota, we’re dependent on protected culture to grow quality flowers. This article describes our approach – planning, financial, and operational details - that helps us make the most of our structures.
 For years, my wife and I have been considering offering a winter CSA, but have been hesitant. This hesitation stemmed mostly from not having any real experience growing over winter (beyond the kale and collards that persist until January in our fields), but also from lacking the proper infrastructure. This year, however, with two small tunnels up and some decent storage facilities, we decided to make the leap. But I first wanted to talk to a few winter growers to see how they run their winter CSAs to get some pointers on what to expect, what to plan for, and how to manage everything from the hoophouse to the wash/pack. Here is what I learned.


