Nothing is more frustrating than trying to profit from a poorly-designed farm. The simplest tasks take too long to accomplish and leave you stressed for more time, the slightest change in climate and weather puts the brakes on production and sales, and buildings overheat in summer or stay cold and dreary all winter. Fortunately, by following a few simple guidelines you can avoid these all-too-common mistakes.
It’s easier to create a good design upfront before roads, buildings and fields are in place. However, life is not always ideal and often requires revisions. Some of the best decisions I’ve made for our farm have involved moving buildings, roads and fields. Although costly, these changes provided more efficiency and savings in the long run.
I’ve distilled farm design into a series of patterns based on the work of designers P.A. Yoeman, Bill Mollison and Christopher Alexander. The process starts with the big picture – looking at the landforms in the landscape to determine the best positioning for roads, paths, buildings and fields. Then it leads into a closer inspection of each element in the farm’s system.
Step 1: The big picture
Ask any architect or designer how they begin and they’ll tell you from a bird’s-eye view. A large project requires a large perspective, so I recommend making a base map of the property showing all the existing infrastructure such as soil, buildings and trees and the land’s topography using contour lines.
While anyone can create a base map by hand on a two by three-foot piece of paper, it’s far simpler to locate your nearest GIS specialist. Most county governments and Natural Resource Conservation Service offices can print a map of your farm with an aerial photo and contour lines. Ideally, the contour lines should be separated by five feet or less of elevation change. However, if your site is flat you may need a one-foot elevation change between contour lines to show the details necessary for a good design. Be sure to have a scale printed on the map or determine a scale based on something recognizable in the aerial image.
To add depth to the base map, use free online web soil surveys to obtain detailed information on soil types and landforms. In conjunction with soil testing, the soil survey helps you to decide the prime location for fields, buildings and planting schemes. Ideally, locate vegetable production in the best soil types, and buildings or forests on sites in need of repair.
After completing all those techy tasks, it’s arts-and-crafts time. I rely on my old school, cut-and-paste skills to get a good view of the big picture. Find a pair of scissors and a large empty table no one else will need within the next few hours, then make paper cutouts of all the components you’ll need such as roads, buildings, fields and greenhouses. For all of you who are squeamish about attempting anything artistic, don’t worry. These cutouts are not supposed be the next Michelangelo or Picasso. They’re rectangles, squares and circles – simple shapes any fourth grader could produce. But it is important to properly scale the cutouts to your base map, and then it’s a matter of moving all of the components around to create the most effective and efficient design.
Here are size recommendations for five acres of vegetable production:
Greenhouse: 1,000 – 1,500 square feet propagation. Keep propagation and production greenhouses separate to prevent disease transfer. (Tip: Pull shade cloth over the propagation greenhouse during the summer and use to cure garlic and onions.)
Refrigeration: Two 200-square foot (floor) walk-ins with separate temperature controls for each cooler. (Tip: Adding a small radiant heater to the cooler allows it to double as a heated chamber for curing sweet potatoes and germinating seeds.)
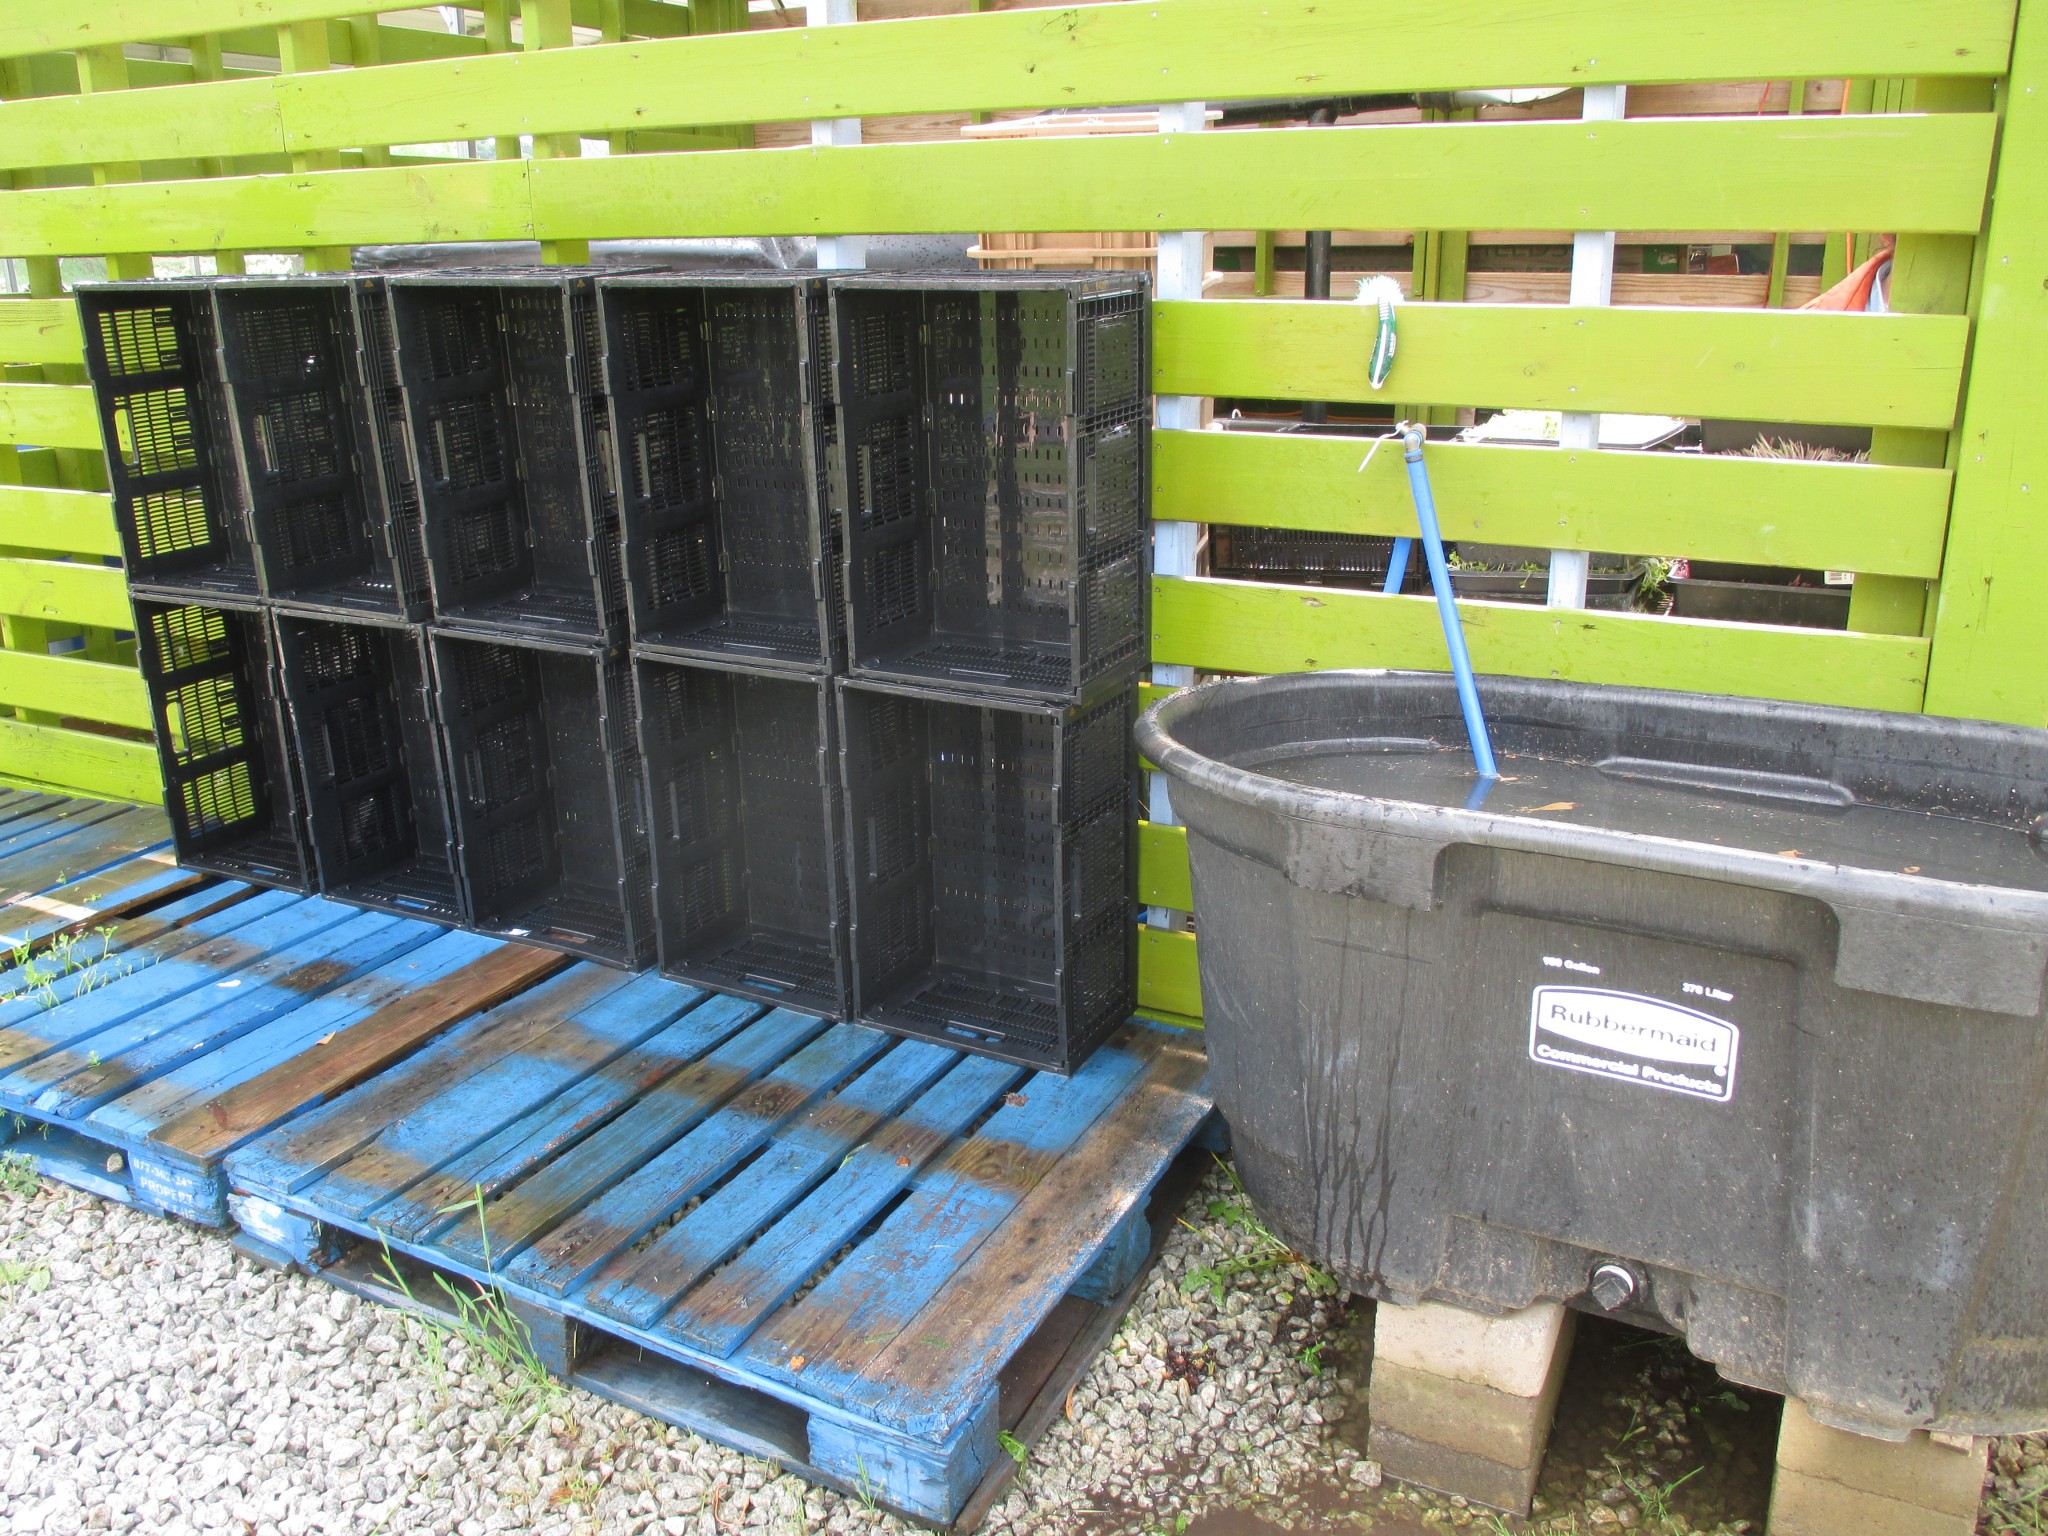
Produce, Bin and Hand Washing: Ideally, this structure has a roof, concrete slab and walls with the ability to heat and cool the structure. Connect this building to refrigeration and include enough space for the following:
1-2 hand washing sinks
30 square foot table pre-wash tub
1-2 Vegetable wash tubs 50-100 gallons
30 square foot table post-wash tub
1 wash tub for bin washing 50-100 gallons
10 linear wall feet to hose off harvest bins
10 linear wall feet harvest bin storage or store bins under tables
10 linear wall feet with shelves for harvest equipment storage
Roads: Minimum 14-foot width for single lane traffic and 20-foot width for two-way traffic. Add an additional two feet on both sides for a vegetated shoulder.
A dedicated wash tub and pallets are set up to wash bins. The pallets slope away from the wall to facilitate washing debris out of bins. For more farm planning ideas, read the author’s book The Bio-Integrated Farm, available from Growing for Market. All images courtesy of Shawn Jadrnicek.
Step 2: Roads and ridges
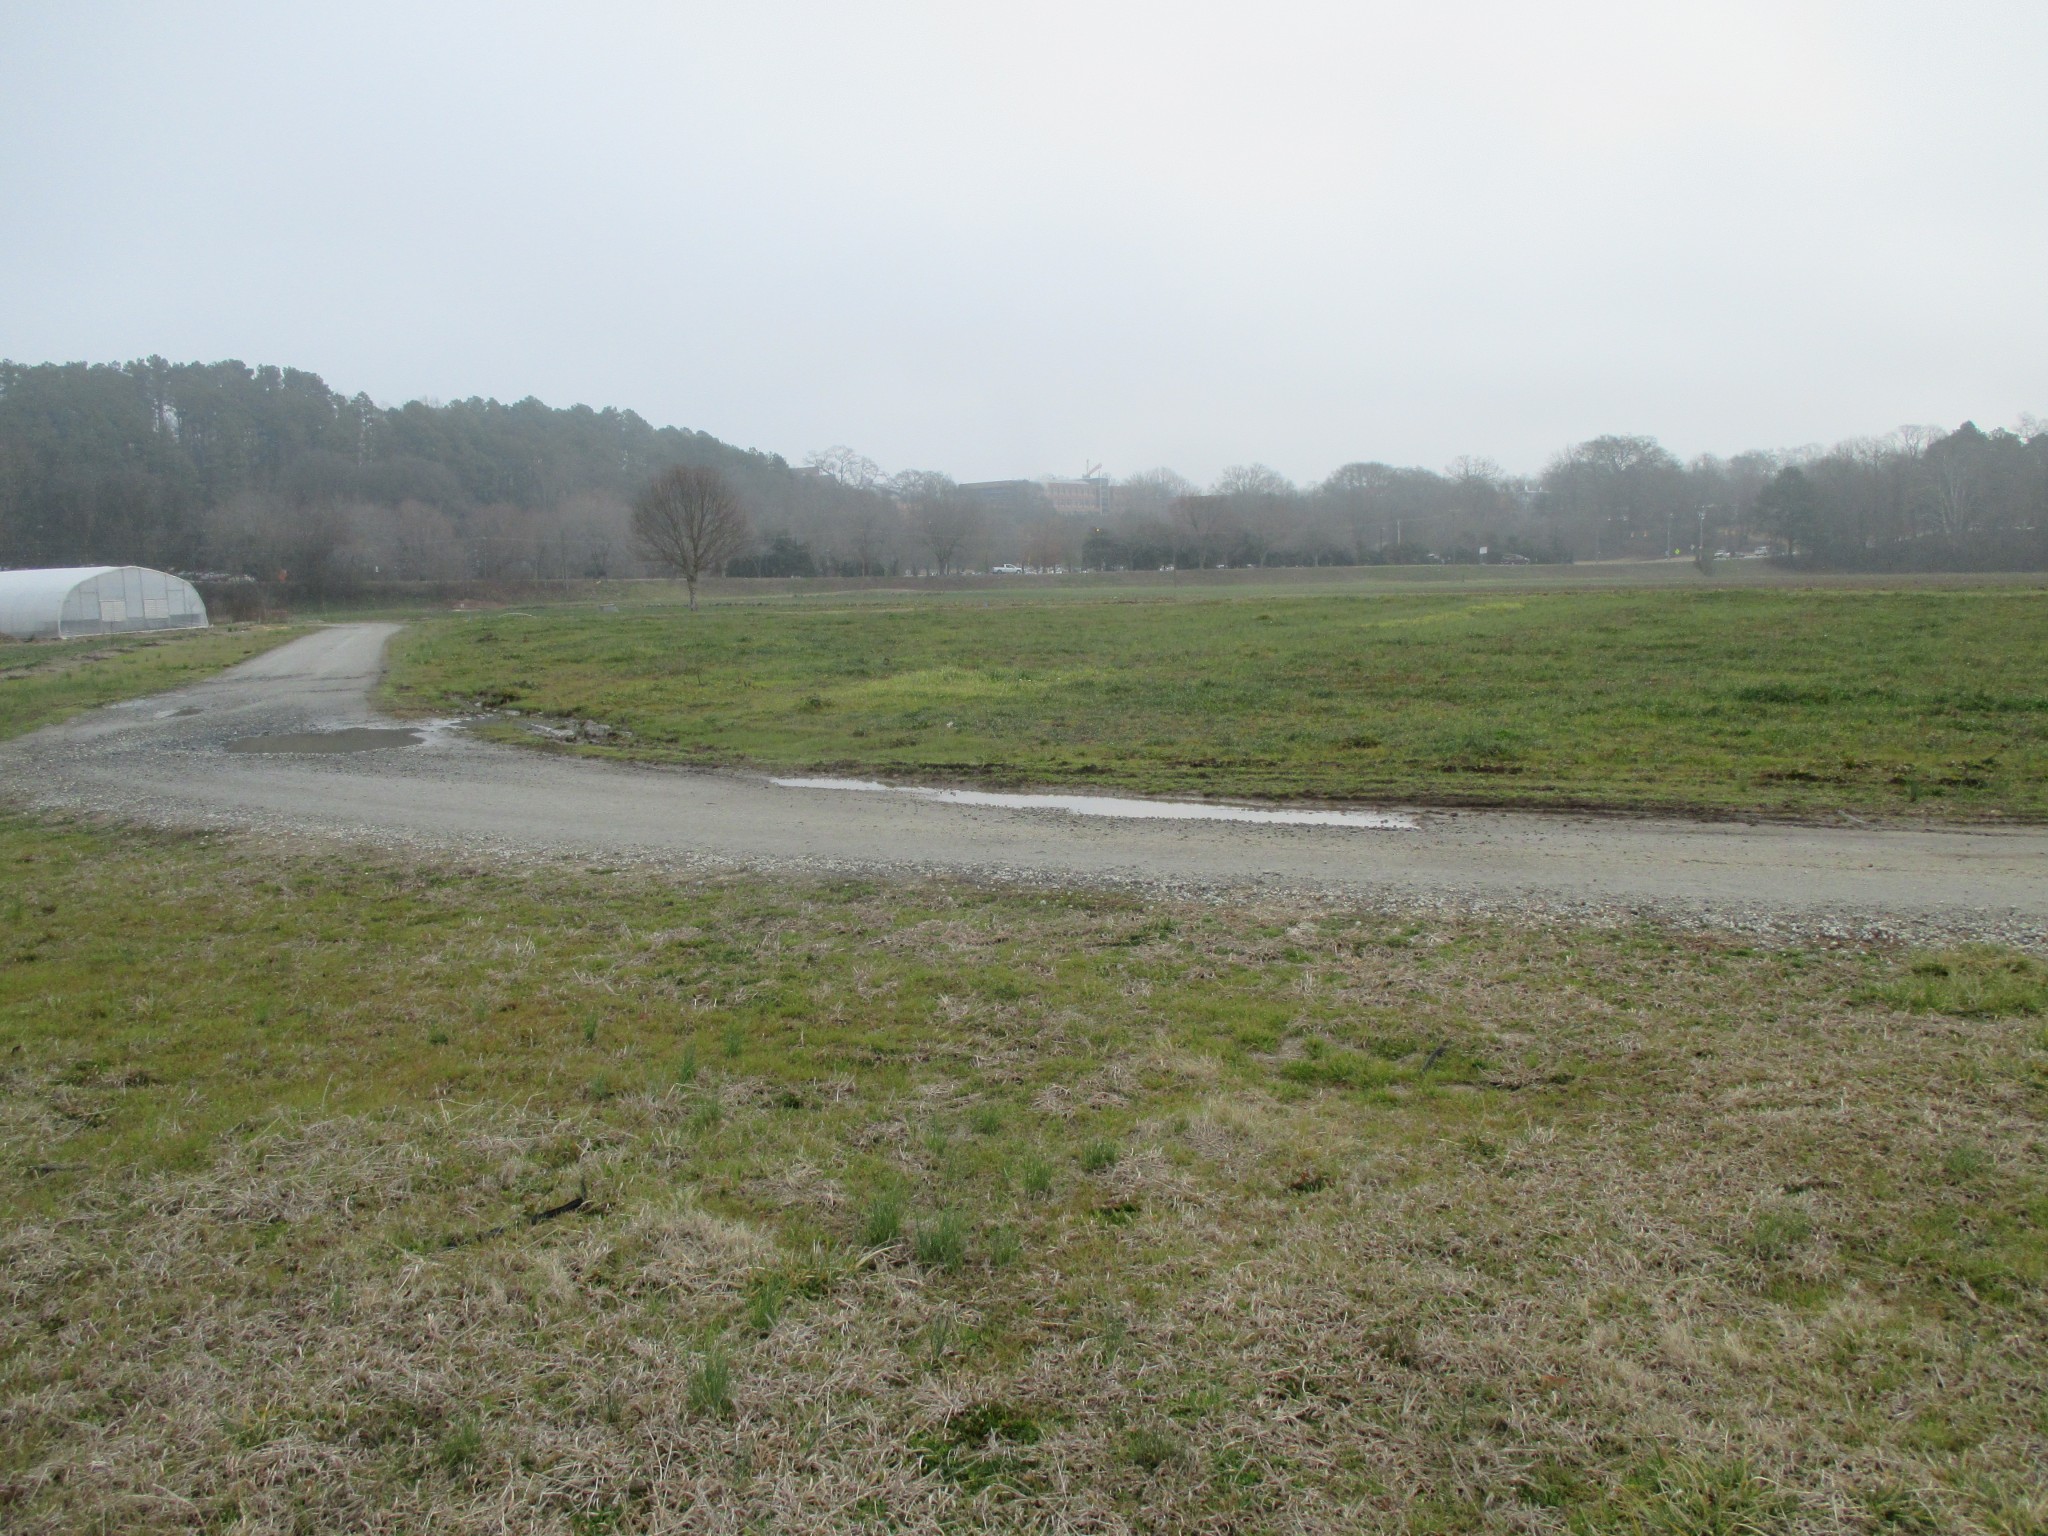
In an attempt to organize fields into squares and rectangles, some farmers have forgotten that water flows downhill. Creating a field without considering water flow can cause damming, prevent drainage or wash away soil and gravel.
If you’re like me, you’d rather spend your time growing food than regrading roads. Gravity is a given, so it’s best to work with it than against it. In my book The Bio-Integrated Farm I write, “First, place main roads and paths on ridges. Ridges naturally stay dry during rain events, making them easily accessible during all times of the year. From a ridge, gravity takes water in both directions away from the road, preventing water from accumulating on the road and washing away road material.”
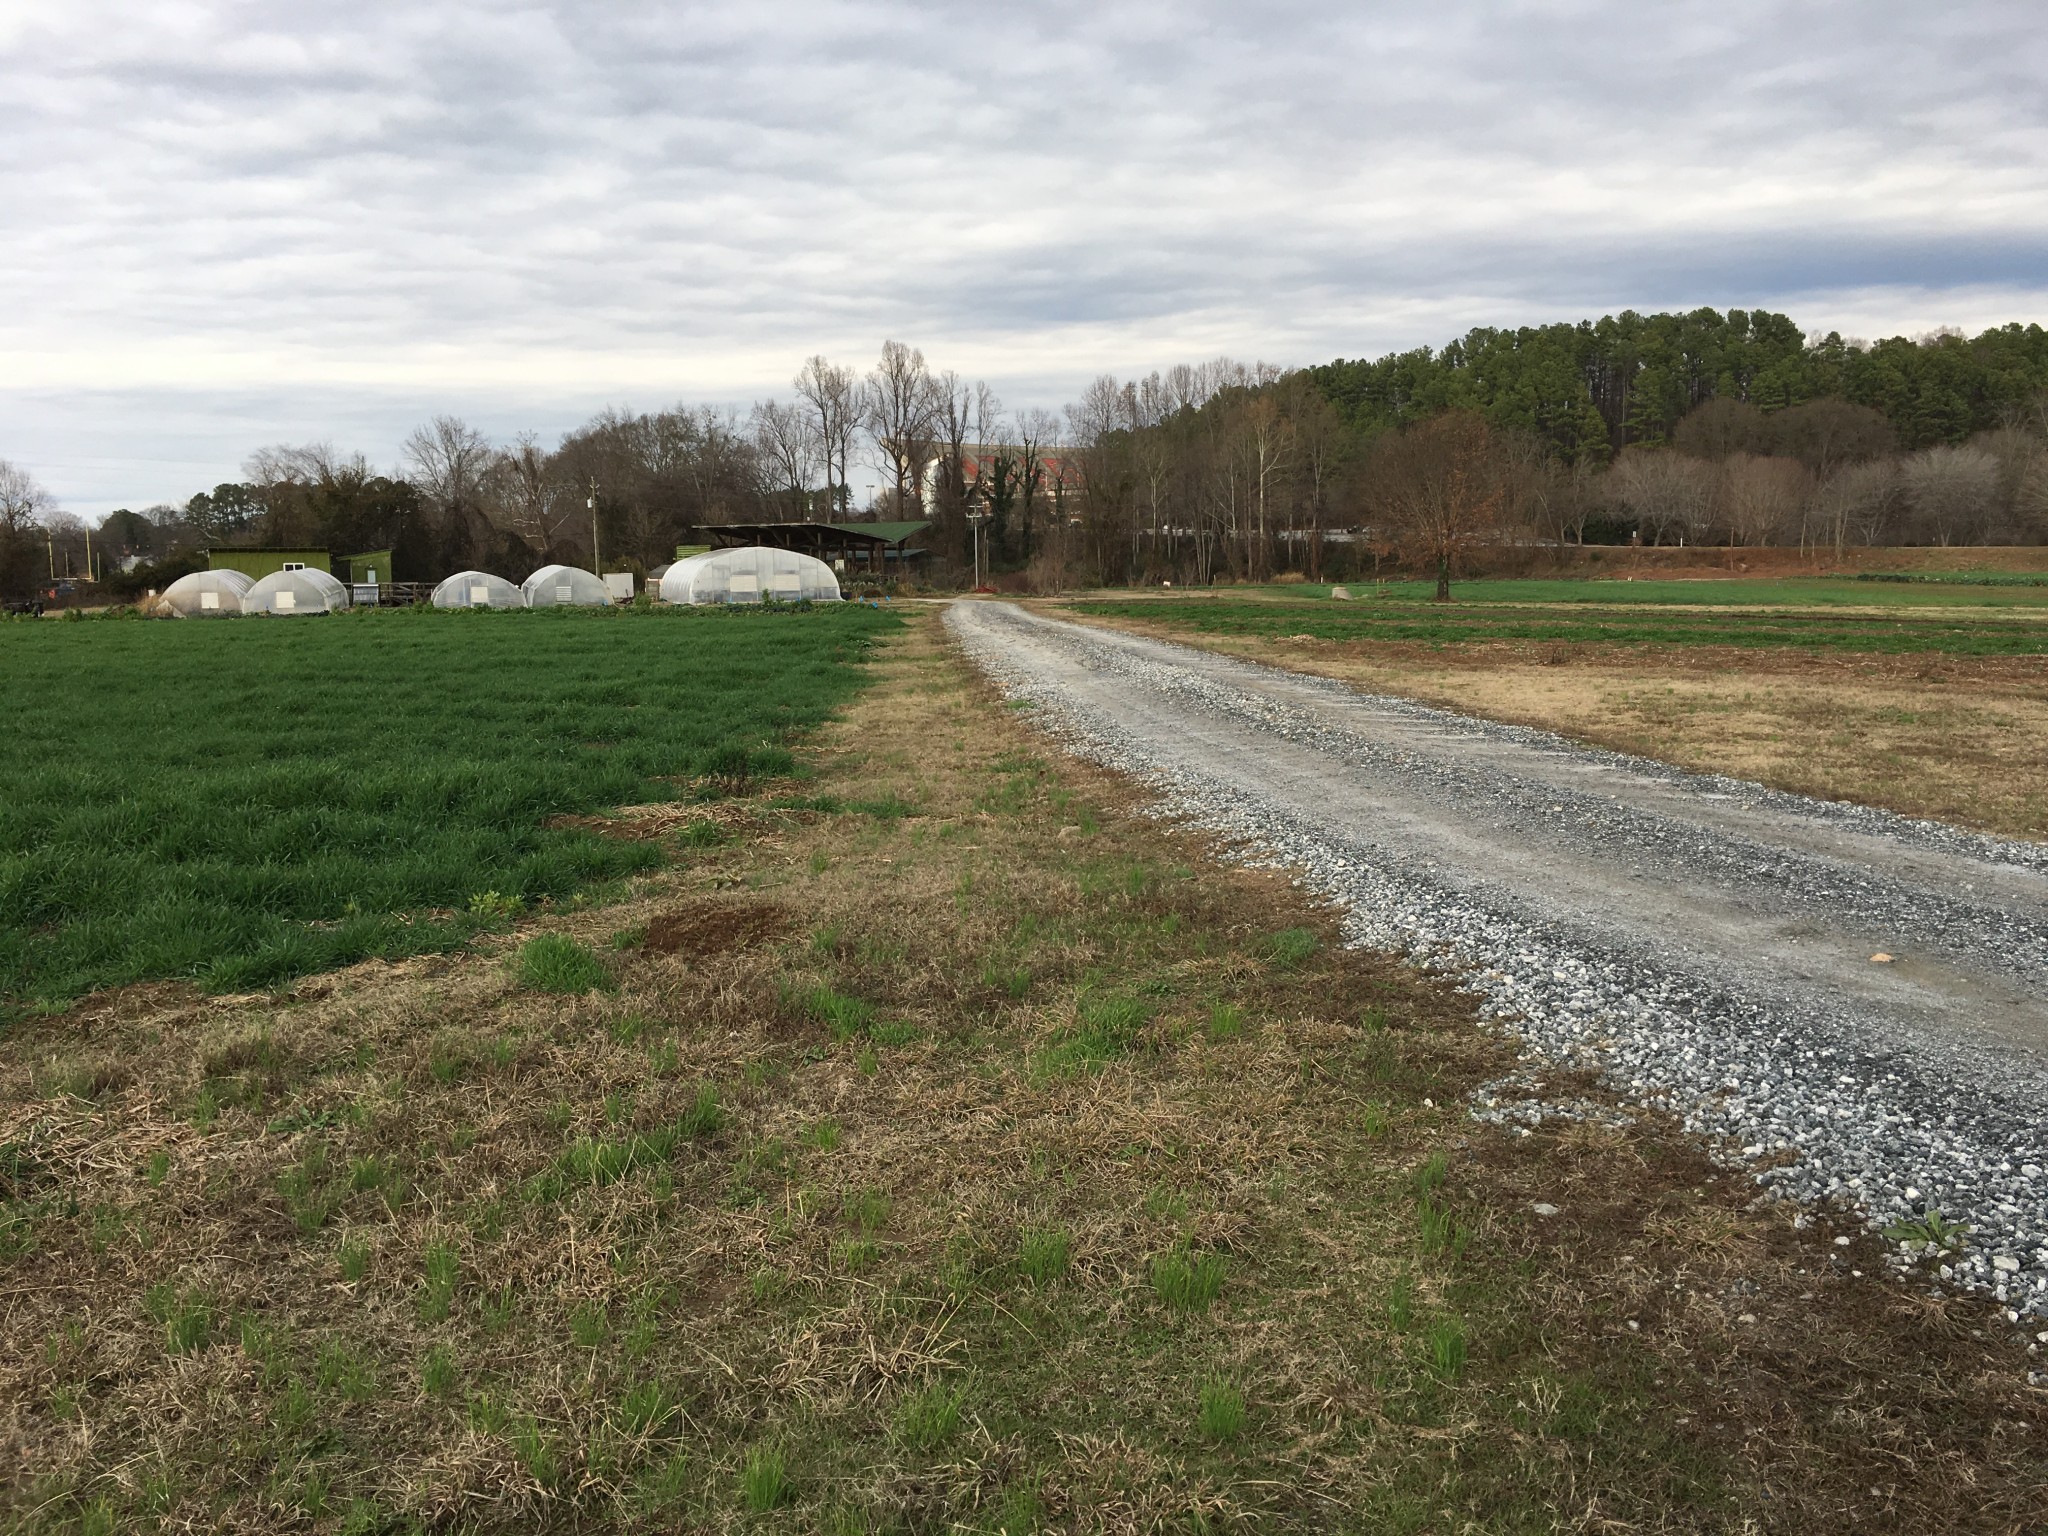
From the contour lines on your base map, determine the ridges, valleys and slope angles. Place all main access roads on ridges or follow the contour in the landscape. A ridge is a long narrow area where water flows off in several directions with little, if any, uphill water entering the ridge. Because the rainwater will shed off of the roads and paths, it won’t accumulate and wash away road material.
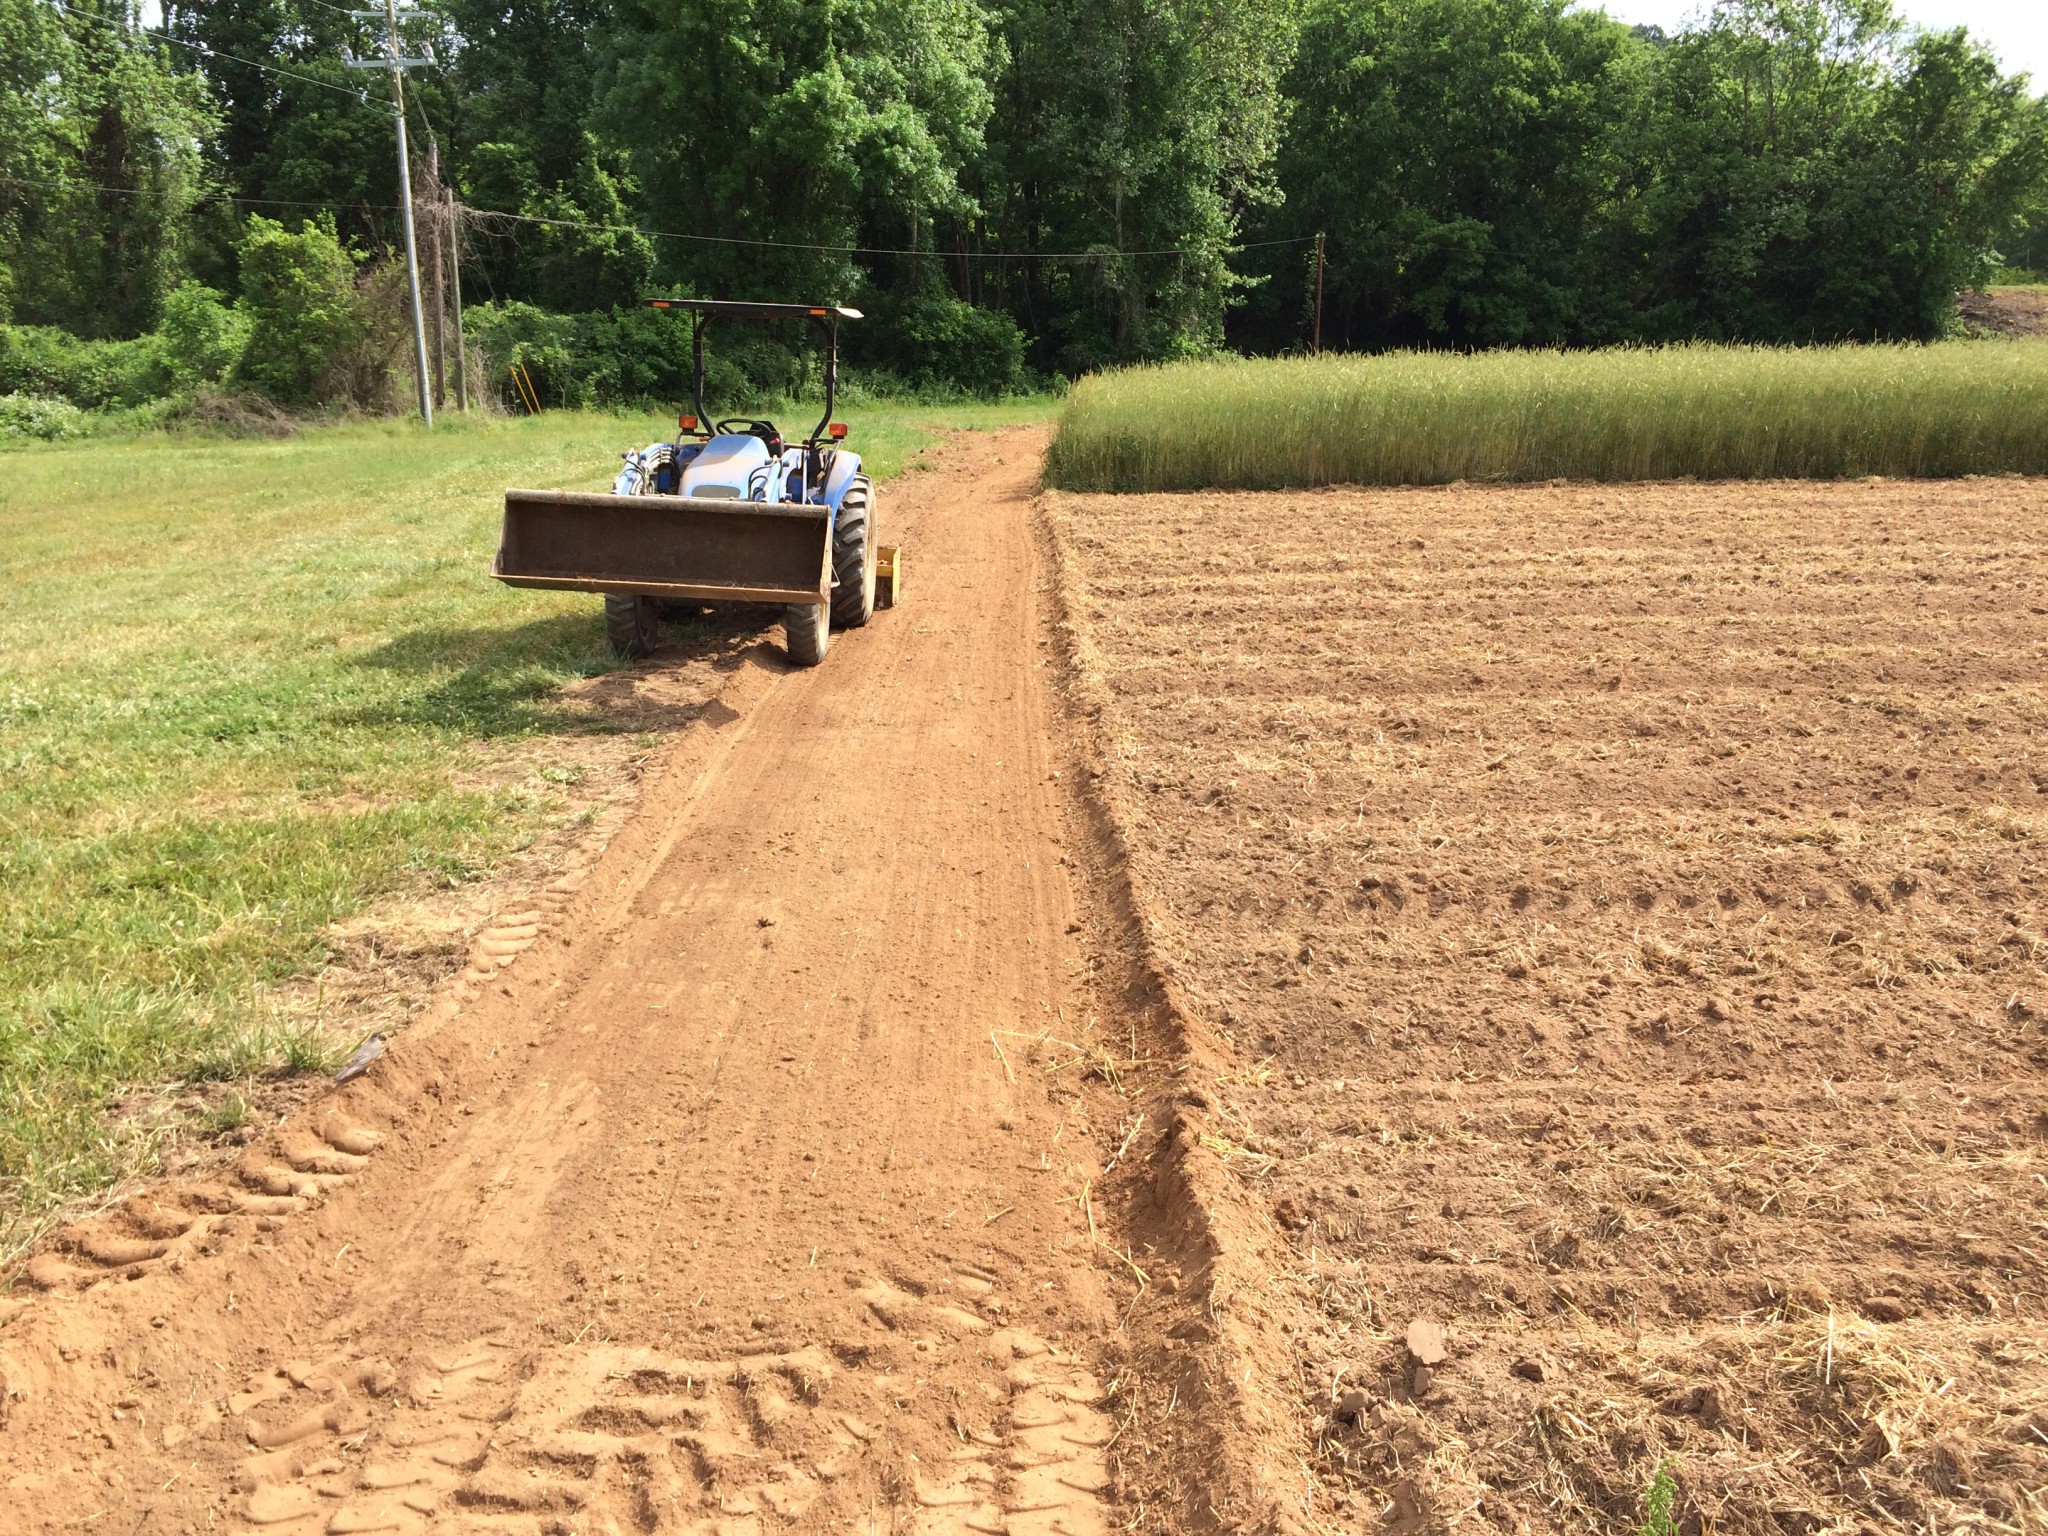
I use the roads-on-ridges pattern to establish the main access route through the farm property and, therefore, the positioning of the fields. Ideally, you’ll grade the fields to create planting beds extending out and away from the road at 0.2 to 1 percent slope. Due to the gentle slope of the beds, rainwater will soak into the field. Rather than pooling, excess water will make its way to the end of the bed as long as the bed slope is continuous. In steeper farmland, beds should slope into grassed waterways allowing excess water to safely flow downhill in a broad area protected by vegetation. The grassed waterway also allows checks or turns in bed directions to match existing contours. In flatter farmland, the beds can drain into a channel or ditch sloped at 0.2 percent to gently move water into a retention pond, basin or grassed waterway to facilitate field drainage.

In the absence of a ridge, run the length of the road at a shallow slope across the landscape with a ditch or diversion channel uphill to protect the road. Always slope the ditch or channel at 0.2 percent to prevent erosion and develop a plan to either use or get the accumulated water into the ground.
Apply the road pattern to building sites as well, placing the buildings on ridges or terraces with a grade sloped away from them and protected by diversion channels. If buildings are improperly placed, puddles form around the buildings and create a muddy mess that gets tracked indoors and requires additional cleanup time.
Top, the road channels water into a corner preventing field drainage and causing it to wash out.
Bottom, the same road was moved to the ridge one hundred feet uphill and now stays high and dry.
Step 3: Prevent farm sprawl
Walking was once the preferred mode of transportation on the farm, prior to the inventions of golf carts and gators. The family’s income intertwined with the family farm so to save time and money, barns, sheds and buildings were located nearby.
Although automated vehicles seem like the antidote to modern farm sprawl, these gas-guzzlers add to the expense and maintenance of running a farm. However, a good design creates a walkable farm – eliminating wasted time and encouraging a healthy dose of daily exercise.
Arranging buildings to form a courtyard is a great age-old design worth repeating. With everything placed in close proximity, expensive golf carts or other vehicles are not necessary. And locating the building complex close to publicly maintained roads keeps road maintenance in the public domain.
Step 4: Grand central
Think of your farm building complex like Grand Central Station – a hub where farm workers drop off produce, pick up tools or pause for a break in the shade. Like any efficient terminal, it should be located in the middle of the community it serves.
If you want to easily access all the useable land on your farm, place the building complex centrally and don’t back yourself into a corner on the property. Further benefits are achieved when the buildings are placed toward the north end of the useable land, preventing buildings from casting a shadow on productive areas. If you’re working with a smaller lot, a northern location is a necessity.
Step 5: Maximize winter sunlight
“Only primitives and barbarians lack knowledge of houses turned to face the winter sun,” Aeschylus 500 B.C.
Elongating buildings and greenhouses on an east-west axis captures winter sunlight and sheds the summer sun, keeping buildings warm in winter and cool in summer. If you can’t place a building on an east-west axis, Alexander recommends adding a south-facing wing to the building.
Place plenty of windows on the winter-sun facing side of the building with a roof overhang to shade windows during the summer. A roof’s job is to shelter the building, so use traditional gable roofs to properly protect the building from the wind, sun and rain. I suggest using passive solar design recommendations based on the latitude to precisely determine the amount of window space and overhang.
I also like to place trees and shrubs on the north, west and east sides of the building complex to help shade the building in summer and protect it from winter’s cold winds. However, be careful the shade-providing trees are properly placed. Commonly a building or greenhouse is positioned during the summer only to find out the spot is in the shade during the winter. Since the sun’s angle changes dramatically throughout the year, use a sun chart or Sunseeker app on your smartphone to make sure sunlight will be available in the winter when you need it most.
Step 6. Parking problems
People will park all over the landscape if there is not an obvious parking area. Inadequately sized parking, turning radius and loading areas create confusion, congestion and allow people to park in unsuitable areas. Another common problem is placing parking areas too far from the buildings they serve. I’ve seen parking areas located 250 feet from market buildings, creating an arduous trek most customers are not likely repeat. Without defined parking, cars will sprawl all over the landscape – leaving less room for farm fields, greenhouses, landscape plantings or fruit trees – and destroy the land through compaction.
Provide enough parking for your employees and customers using the guidelines provided in local ordinances. Connect the parking areas to buildings that need the parking to avoid unnecessary walking time. Finally, no one likes the aesthetics of a sea of cars, so make a series of smaller lots instead of one large lot and conceal the cars with shrubs and trees.
When it comes to turning around the tractor and farm truck, it helps to measure the needed turning radius and plan that into the design. Typically, a vehicle with a trailer will need a turning radius of 50 feet measured from the center of the road. Leaving enough room at the ends of fields and around buildings will prevent accidents and three-point turns from slowing you down.
In flat areas with slopes less than 2% a ditch is dug at the bottom of the field to facilitate field drainage. Below, the field slopes at 0.2% towards the ditch and the road is on the ridge out of sight.
Step 7. Circulation
Farming involves moving things around. Produce comes out of the field and fertilizers, transplants, farm workers and equipment go into the field. Minimize congestion and steps traveled by developing separate circulation realms for produce washing, farm equipment and customers. Each area has its own access point and all the tools needed in the area are within arms’ reach. As produce comes out of the field, it should only need to be lifted once to be placed on the farm truck or harvest wagon. Tables, scales and washtubs are all at the same height to prevent further lifting as the produce moves to the fridge.
One step at a time
After finalizing your plan, break it down into manageable projects and tackle them one at a time. I use triangulation techniques to take what I created on paper and place it into the landscape.
If you already have infrastructure in place it helps to prioritize changes based on how much money and time you will save. I realized our farm workers were spending an estimated 297 hours a year walking to our shed located too far away from the rest of the buildings. Since it only cost $300 and eight hours of labor to move the shed, this project paid for itself within the first year. We finally moved the last road on the farm at a cost of $800. We were spending an average of $400 on washed-away gravel every year and about four hours of time regrading. Since we moved the road we haven’t had to add gravel or regrade as much as before, so this project will pay for itself in several years.
Farming is fun, but it’s also a business. Nearly every business model works on the basic principles of saving time and money, and I advocate for this efficiency. However, there’s also another element in growing food – quality. So the best farmers figure out how to save on the first two without compromising the latter.
Shawn Jadrnicek is the author of The Bio-Integrated Farm: A Revolutionary Permaculture-Based System Using Greenhouses, Ponds, Compost Piles, Aquaponics, Chickens, and More. He has nourished his interest in sustainability through work as an organic farmer, nursery grower, extension agent, arborist, and landscaper, and now as the manager of Clemson University’s Student Organic Farm.

 Like all of you, I’m always trying to make little improvements around the farm, and I’m never finding enough time to try all of my ideas. Last year I had the opportunity to rebuild the packing area at Cully Neighborhood Farm (CNF) and to also build three prototype pieces of furniture for a new packing shed at the North Willamette Research and Education Center (NWREC) for their small demonstration farm and to try out some of my ideas.
 Northern California is beautiful in its own unique way in August, with dried out hills covered in brown grass and widely branched, stately live oaks sprinkled around, and a


 Phenology is the study of recurring plant and animal life cycle changes in relation to the weather. Some changes are temperature-dependent, not calendar-dependent. The opening of some buds and the emergence of some insects from the ground are related to the accumulated warmth of that season. It isn't just superstition that some events occur simultaneously every year, but on dates that change from year to year. It is the result of two events being triggered by the accumulating warmth having reached a certain threshold. It's about what is happening, not a premonition of what will happen based on the width of woolly bear caterpillar stripes!


 Farmer to Farmer Profile


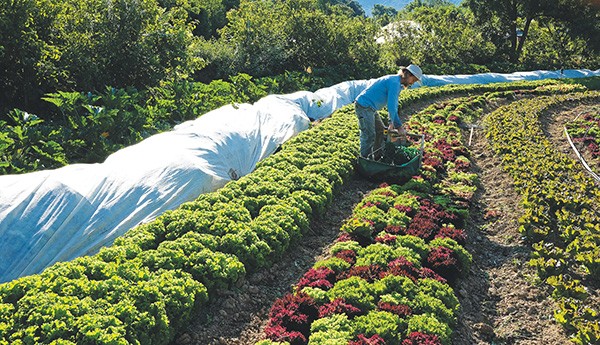
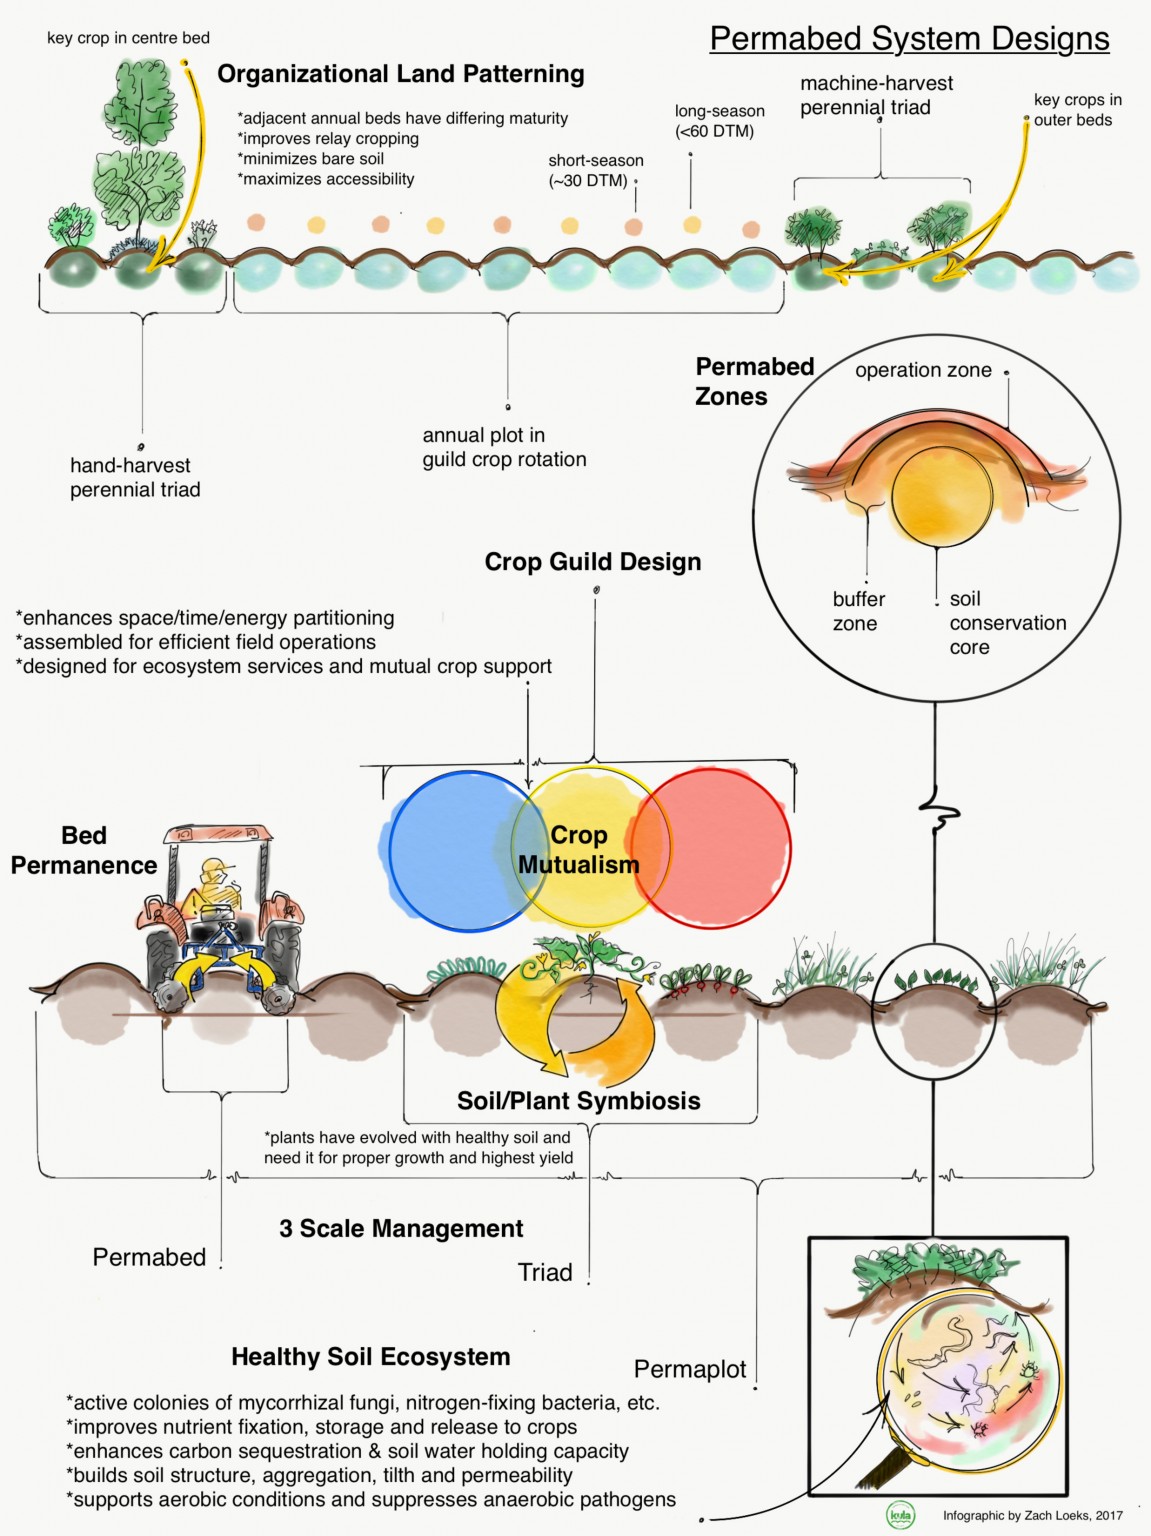 This is the first of a two-part article about using permaculture techniques to improve the profitability and resiliency of market gardens.


