By Carolina Lees
Part 1 of this series discussed why and how to add cut flowers to your vegetable farm. This part discusses production in more detail, especially harvest and post-harvest handling. Part 3 will focus on marketing.
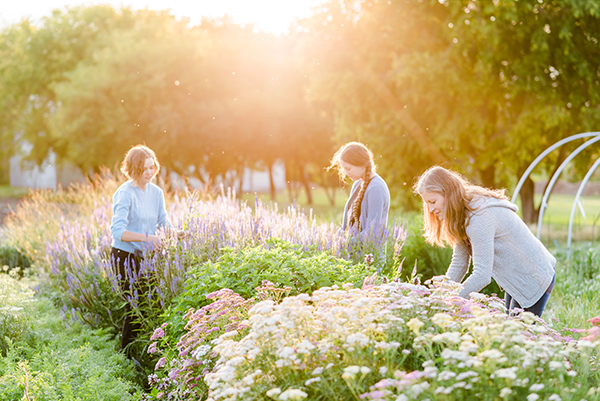
Growing cut flowers is similar in many ways to growing vegetables, particularly if you are working with annuals. But there are some important differences. I’ve learned a lot from adding flowers to my own farm, and I’m going to share some of it with you here.
Planting
When growing cut flowers, the goal is to have long, strong, straight stems, and many production choices focus on that. Flowers can benefit from a bit of crowding in the field; tighter spacing leads to longer stems and increased yields of marketable flowers. Properly spaced flowers will hold each other up as they grow, keeping stems straighter and longer. Flowers have pretty high yields overall per bed foot and a small planting can go a long way.
Many flower growers plant into landscape cloth with holes burned into it for weed control. To burn the holes at such close spacings, some growers use a template cut out of sheet metal laid over the cloth and burn them with a torch. Floret Flowers sells premade templates for different spacings, or you can make your own. It takes some time to burn the holes, but landscape cloth prepared this way will last for years.
Drip irrigation has many advantages for flowers. The dense plantings don’t dry out well in between waterings, and fragile flowers can be damaged by heavy spray. Wetting the foliage makes tall flowers heavier and more likely to topple over, damaging the marketability of the crop, and promotes mold and disease.
Insect and disease pressure are obvious concerns for flower crops, as their aesthetic value is their primary appeal. Management strategies are similar for flowers and vegetables. I am reluctant to spray flower crops with insecticides, as the blooms attract many pollinators and beneficial insects, and I’d be careful about using fungicides for the same reason.
Pinching
Pinching is an important step that drastically increases the yield of many flowers. Once the plants are six to eight inches tall, I pinch out the top couple inches of the central stem above a leaf node (the same way I harvest basil). The plant usually stalls for a couple of days, then starts to branch out from the nodes below the pinch. After pinching, the plant produces several stems of marketable length and quality at once, and continues to produce steadily thereafter.
Pinching can delay flowering by a couple of weeks, but it increases total yields. I’ve found that if I don’t pinch, I still get a delay, but it’s after harvesting the first stem. The next set of stems tend to be smaller and less marketable than they would be if I had removed the central stem early and let the plant focus more energy on those side shoots from the beginning. I prefer to have a steadier stream of marketable stems, even if they are delayed. Some growers pinch just part of a planting to get the best of both worlds.
Some flowers should NOT be pinched, such as single stem sunflowers, single stem stock, Bombay celosia, or statice. A few flowers that greatly benefit from pinching are zinnias, cosmos, dahlias, and branching sunflowers.
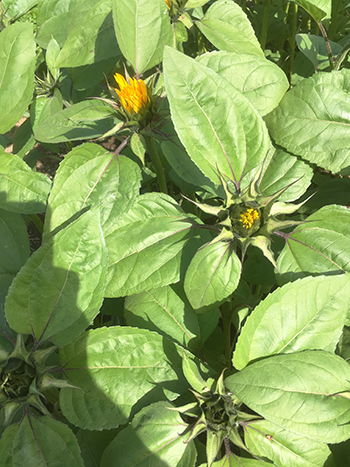
Three stages of sunflowers. The bottom one isn't ready, the middle one is just ready to cut, the top one is at the author's preferred harvest stage. All photos courtesy of the author.
Trellising
In pursuit of long, straight stems, many flowers benefit from support. Proper spacing helps stems stretch, as the plants support each other as they grow. But many will still topple over at the edges of the bed or after a rain, and some crops just won’t hold themselves up. I’m using light duty posts and twine, like I do for eggplant and determinate tomatoes, along the edges of my branching sunflowers, snapdragons, and strawflowers, and I will probably install it in the dahlias. My sweet peas are trellised along with my sugar snaps.
For flowers that require more individual support, many growers use Hortonova netting stretched horizontally across the bed in 1 or even 2 layers. The netting can be held in place with posts or tall hoops, and should be installed when plants are small so they can grow through it and have support down low. This is particularly important come harvest time, as it is a challenge to harvest through netting that is too high.
Harvest timing
Now you’ve grown the flower crops and it’s time to harvest! Look at all the beautiful blooms…
Actually, if you are seeing a field full of blooms you may be too late. Many flowers should be harvested before they have fully opened. Harvesting at the right stage is critical for the best vase life and happy customers. Too late, and blooms will rush past their peak too quickly. Too early, and your blooms may not open at all.
Each flower is different, and it’s best to look up individual crops before they start to bloom so you can identify the right time to start harvesting. Some, like lilies, should be harvested while still in bud, often when the first lines of color start to show. Others can be harvested half open, like rudbeckia; some, like dahlias, don’t open much at all after being cut. Harvesting flowers in the earliest stage possible is a good way to avoid insect damage, as bugs can’t eat flowers that aren’t open yet.
Since flower crops are still new for me, I like to keep the first few blooms in the house so I can observe how they age. I’ll harvest a few at different stages of openness and put them in a vase to see what happens.
Educating yourself about proper harvest stage and post-harvest handling gives you more flexibility in when and how you sell your flowers. Many flowers can be harvested in bud and held in a cooler for later use. Tulips are often pulled up, bulb and all, and stored for weeks to be sold as needed. Last year, I made the mistake of harvesting my sunflowers when fully open. The petals fell off before they even made it to market! Now I harvest them just as they begin to show color and open up, and they keep perfectly for well over a week.
Knowing how my flowers behave allows me to plan ahead, bringing just the bouquets I think I can sell to market and holding onto valuable blooms for later use. I can also adjust my bouquets and bunches to make heavier use of shorter-lived flowers, increasing my total marketable yield.

Harvest mechanics
I prefer straight snips for harvesting flowers, the same tool I use for basil, cucumbers, and more. Bypass pruners (Felco style) are another popular choice, and I use them regularly for cutting greenery and woody branches.
Flowers are ephemeral and it can be hard to keep up. Most pass through the ideal harvest stage quickly, and you have just a short window to get them when they’re perfect. Some are more forgiving; spike flowers (like snapdragons or digitalis) bloom from the bottom up and you can always strip off a few spent blooms. You may have to harvest certain flowers daily, sometimes even twice per day in hotter climates, to avoid them going past.
Longer stems give you more versatility, since they can always be cut down for shorter applications. It allows for trimming ends as they are stored, both in your cooler and by your customer. It makes them easier to fit into buckets undamaged and to keep them hydrated.
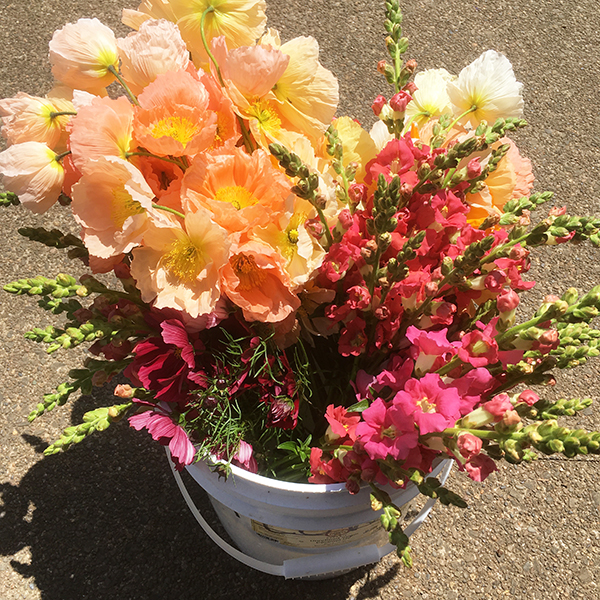
A freshly cut bucket of flowers, bunched and ready for the cooler. Included are Iceland poppies, snapdragons and cosmos.
Some flowers have naturally longer stems than others. Single stem sunflowers are a breeze to cut; anemones are a bit squat in stature. In breeding and selecting cut flower varieties, stem length is of great importance. I often drop perfectly good flowers because the stems are too short.
Harvesting should be done early in the morning or in the evening, outside the heat of the day. When harvesting, I cut deep into the plant, then strip off leaves and side branches to leave a bare stem. How much to leave and how much to strip varies from flower to flower, and also on its final destination.
Some flowers grow with a single bloom at the end of a stem, some have a spray or multi branched habit. Often, you have to sacrifice side branches and some of the future blooms. It’s always a balance between harvesting long, usable stems and leaving enough to bloom later.
Many flowers are vigorous growers and respond well to cutting, so as I’ve progressed I’ve found myself cutting them harder and stripping more to give myself better stems. Often when I don’t, I end up discarding or breaking the smaller blooms when I go to make bouquets. It just takes practice to figure out what you need.
And maybe this is obvious to others, but it was new to me: handle the flowers low down on the stems. When I started, I was more focused on the blooms and tended to handle them high up by the flower both during and after harvest. Flower growing got a lot easier when I started handling them closer to the cut.
I bunch flowers as I harvest them. I use the same #33 bands I use for all my vegetable bunching, and so far, that’s working out well for me. I work my way around a patch, harvesting all the flowers that are ready and removing ones that have passed prime. I lay bunches down on the ground as I go, then collect them when I’m done.
Picking a standard number of stems per bunch makes it easier to track how many you have of each kind of bloom, which comes in handy when making mixed bouquets. If you are selling to florists or wholesalers, ten stems to a bunch is standard, though it can vary. I’m bunching for my own use, so I don’t stick to ten, but bunching makes them easier to collect and handle.
When bunching flowers, line up the cut ends, rather than the blossoms. This way no stems are left out of water when you put them in a bucket. I sometimes trim back extra long stems so the flowers line up better and don’t get crushed in the cooler.
I bunch more delicate stems with a few wraps around the whole bunch. For thicker stems, I was shown a florist wrap. Loop the band around one stem, at least several inches up from the bottom. Loop the other end around your finger and wrap it around the full bunch a couple of times. Secure it at the bottom by looping around a single stem.
Post-harvest handling
If long stems are the name of the game when growing and harvesting, hydration is what it’s all about in post-harvest handling. Once a flower is cut, it loses its connection to the roots and source of water. The sooner you can get it into water the better. After reading Lynn Byczinski’s The Flower Farmer, I started to think of my harvested flowers as living plants that I am caring for, just like my crops in the field. That helps me to understand their needs and treat them right.
Cleanliness is critical for good vase life and vibrant flowers. Flower buckets and containers should not just be rinsed but actually scrubbed out with soap before every use; some growers sanitize them every time. Miniscule amounts of bacteria and dirt can clog the flower’s vascular system, keeping them from taking up water and speeding their decline. I noticed a marked difference in the quality of my flowers when I started taking a few extra minutes to scrub the buckets out.
I harvest into designated 5-gallon buckets, scrubbed and filled with about six inches of clean water. Other growers use flower buckets, purchased from wholesale floral suppliers or sometimes free from grocery floral departments. I know one grower who harvests into small plastic trash bins from Ikea.
For now, my harvests are small and quick enough that I bring them back to the cooler before putting them in water, but eventually I will bring buckets of water out to the field with me. The quicker the flowers can get into water and start drinking, the better.
After cutting, flowers should be allowed to hydrate for several hours before being processed into mixed bouquets or arrangements. Some flowers are reluctant to hydrate, and it’s recommended that the stem ends be seared briefly with a torch or boiling water to burn off the sap. Woody perennials usually require extra attention for hydration- one trick is to split the bottom inch of the stem with your pruners.
Many growers use floral preservative or flower food in their water. This is available in bulk or in individual packets from floral wholesalers and seed companies selling cut flower supplies. Flower food helps flowers hydrate, sanitizes their water, and feeds the blooms as they age. Some flowers don’t benefit from flower food, but many do.
Most flowers store best in the cooler alongside your vegetables. Some flowers, like zinnias and basil, don’t like to be cold. Others are particularly sensitive to ethylene gas and shouldn’t be stored alongside apples, tomatoes or other ripening fruits. If cooler space is at a premium for you, most will hold fine in a cool shady space or air-conditioned room. You just won’t get quite the holding power or versatility a cooler affords you.
Some flowers continue to grow and move after cutting and need to be stored straight. A few days after harvesting my first strawflowers, the tops of the stems had grown bent and twisted in the cooler. If it’s a problem, you can use cardboard or newspaper to make a funnel for them, or just make sure they are held up straight in the cooler.
To store flowers for later use, you can increase their vase life by changing the water, cleaning the bucket, and trimming the stem ends every couple of days. And they sure do make a cooler smell good!
Perennials and season extension
Annuals are the easiest place to start for most vegetable growers, but perennials can be a great asset for your farm. Some perennials have expensive planting stock or take time to establish, but others can be started from seed and grown quickly. Many can be treated as annuals.
Perennials are some of the best producers for winter and spring cuts. Since most annual flowers are at least 60 days to harvest, perennials can fill in the early gap before your annual flowers are ready, particularly if you have limited greenhouse space. At the end of the season, conifers and late fall berries can be harvested for wreaths and seasonal decorations.
Bulbs are your friend for early spring production. In most climates, they can be fall planted outdoors for harvest the following spring. In my climate, I have to plant all late season vegetable crops before most summer crops are ready, so I rarely double crop outdoors. But with bulbs, I can plant late in the fall when I plant garlic and have them out of the bed by the time I need it for summer vegetables. This year, I had Dutch iris ready for my first mid-May market from a November planting. My tulips, planted at the same time, were blooming at Easter.
Many bulbs are grown as annuals by flower growers, using extremely dense plantings. Tulips are commonly planted in trenches like eggs in a carton, with bulbs crowded together and then buried. Lilies are grown in crates of potting soil and planted throughout the year in some climates.
Treating bulbs as annuals rather than perennials costs a lot up front in planting stock, but it provides big savings on weeding and crop care and leaves more growing space for summer crops. Other perennials often grown as annuals include ranunculus, anemone, and Dutch iris.
Economy of scale is a big factor here. Many growers order bulbs by the thousand, making this approach more economical. Tulips, Dutch iris, and lilies are all single harvest plants, but ranunculus and anemone produce extended harvests of blooms in the early spring for a better yield on your investment.
I have been slowly adding perennials to my farm, initially for fruit production and now for ornamental cuts. I’ve enjoyed nurturing the same plants over time, and I like the different rhythm of work. Many jobs for establishing and maintaining perennials are done in the winter and early spring, including planting, mulching, and pruning. But perennials still require year-round maintenance, as they need to be kept weeded and watered to produce healthy, beautiful cuts.
Some perennials can be planted outside of prime production areas to provide ornamental cuts as well as wildlife habitat, wind breaks, and more. While this wouldn’t be efficient for wholesale production of those flowers or branches, a mixed hedgerow can provide you with interesting elements for mixed bouquets throughout the year along with many ecological benefits.
You may already have perennials on your farm: some fruiting plants can be dual purpose. I have been harvesting excess primocanes from my raspberry patch for greenery, and fruit tree prunings can be forced for early spring flowering branches. I frequently see images of berries and fruits used in arrangements, though for me they are more valuable to sell as food than as flowers.
I’ve really enjoyed diving into the world of flower growing, and I’m learning more every day. Look out for part 3, where I’ll be diving into how to market your flowers.
Carolina Lees started Corvus Landing Farm in 2010 at the Oregon coast. She and her crew farm two acres of vegetables, providing for the small communities surrounding the farm through farmers markets and a 60-member CSA.


 Over the last 10 years, there has been a lot of information coming out pertaining to growing veggies in soil in greenhouses. We wanted to share some of what we’ve learned over the past 13 years growing flowers under plastic and touch on some new approaches we’ve implemented since we last wrote about greenhouse growing (see our GFM articles in November 2014, November 2015, and April 2018).
 Farming in any location is challenging. Imagine the challenge of growing crops at latitude 54.5° where winter temperatures hit minus 40° Celsius (minus 40° Fahrenheit) and a mere 100-day growing season can be abbreviated with a large dump of snow at the beginning of September. Meanwhile during the spring, Chinook winds blow and the high latitude’s strong sun alters flowers’ growing cycles.
 Northern California is beautiful in its own unique way in August, with dried out hills covered in brown grass and widely branched, stately live oaks sprinkled around, and a

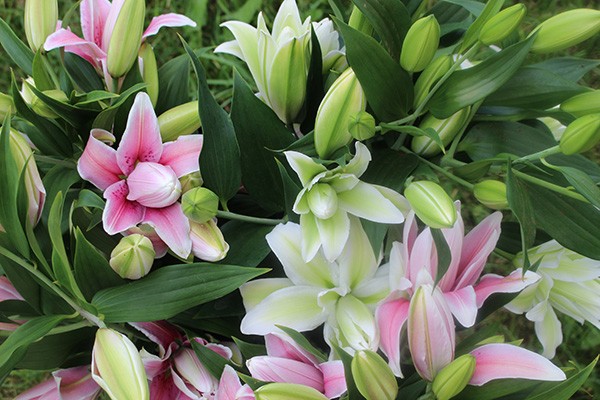 As soon as we start driving our routes in the spring our customers ask us when we’ll have roselilies. They’re that popular and have become a signature crop for us. They’re basically a type of oriental lily, but with multiple layers of petals, and without stamens and pistils (i.e. no pollen!).
 It takes courage to farm, no way around it and no matter what you farm. If you are trying to pull a living from working the land, you learn to live with risk on a daily basis, in a way that earning a regular paycheck won’t teach.
 Fifth Crow Farm lies nestled below some ragged hills – the native grass fully brown, the oaks wide and green. The farm grows 50 acres of certified organic crops on 150 acres of leased land, including vegetables, cut flowers, dry beans and eggs. The farm land is completely flat, tucked in a tiny valley in zone 9B. Believe it or not, just across the street, a mere two miles from the ocean, there are acres and acres of open land with cows grazing. How can land so close to such beauty, and with such a wonderful growing season be devoid of development? The answer is complicated, but mostly it’s because the parcels of land have always been quite large, and much of it is being purchased for conservation purposes.

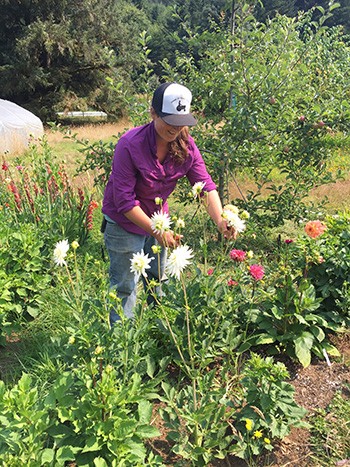
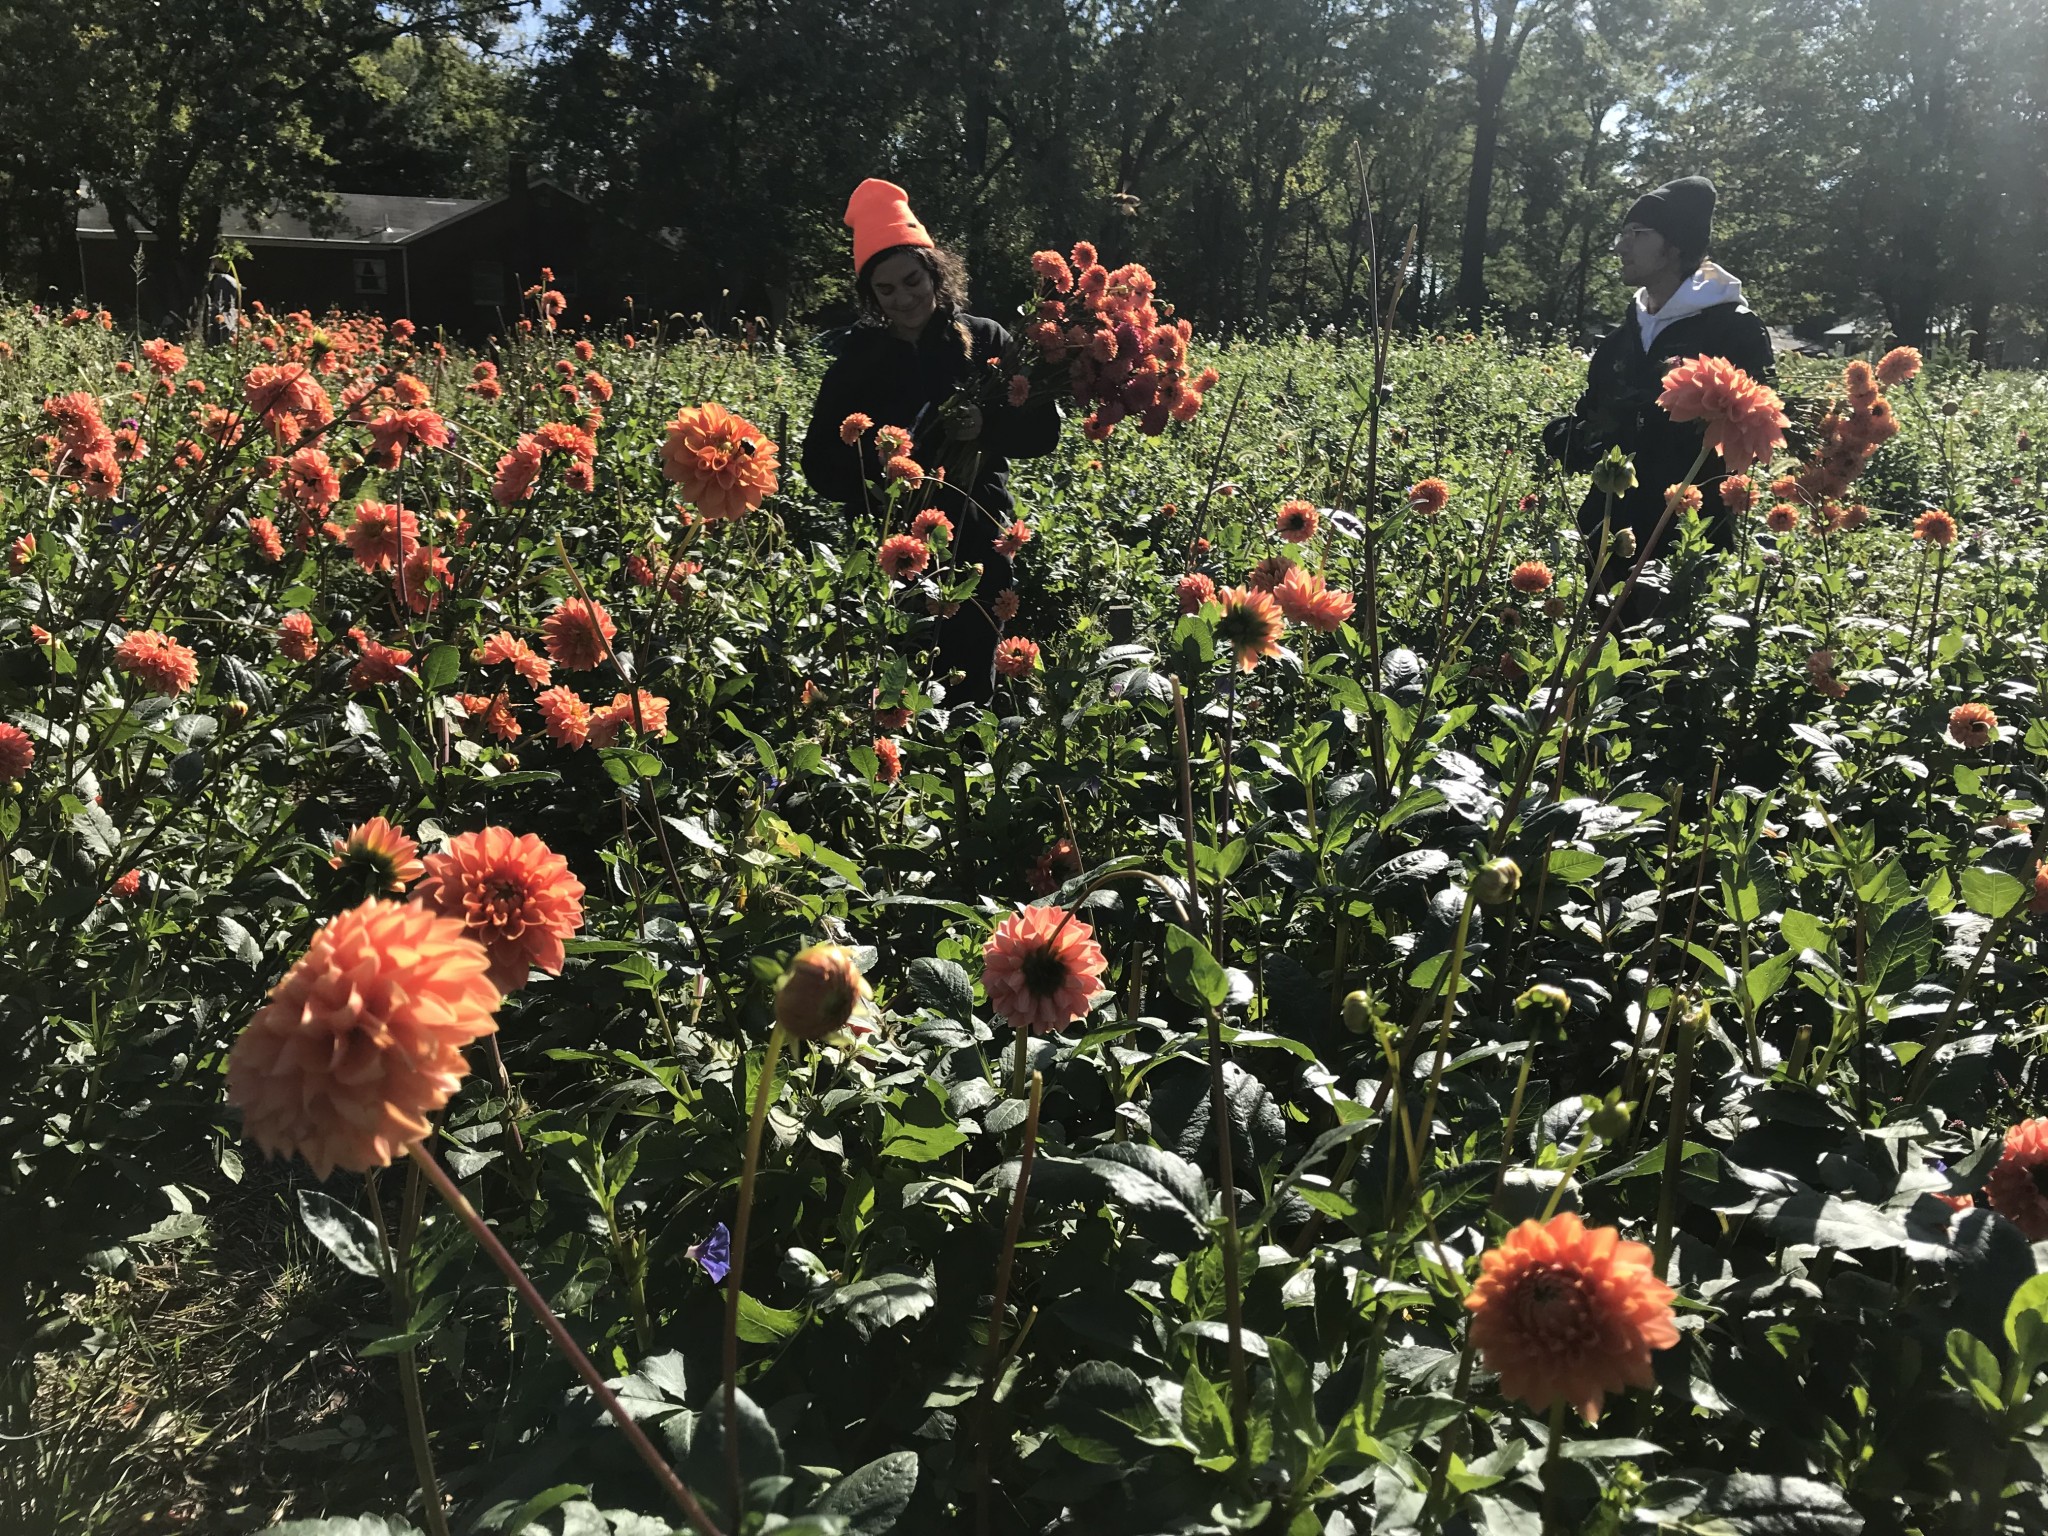 Dahlias were our number one crop this year, even beating out lisianthus and ranunculus by a landslide. We have tried many different methods of growing them, and these are the solutions we’ve come up with. I’m sure there are still better ways, and if you know of any, definitely send them our way! This year we planted 7,000 dahlias and plan to plant even more next year as we increase our growing space. Let’s just start at the beginning with planting and work our way through the whole process.


