Post your favorite farm-made tool on social media using #toolsforgrowingformarket or email it to us at [email protected]. If Josh picks your tool, you win a $50 tool gift certificate and a Full Access sub to GFM!
By Josh Volk
Until two years ago I was germinating all seedlings in greenhouses using almost exclusively bottom heat from electric heat mats. At my current farm we only had space for about 8-10 trays on our two mats and we definitely noticed differences in the germination (and presumably the heat the mats were providing) on the edges of our trays.
I’d seen a number of farm built germination chambers using things like old refrigerators, or plastic film covered shelves, or insulated wooden cabinets (if you search the GFM archives you’ll find a number of mentions of germination chambers as well as Ben Hartman’s very similar design for one from back in October 2013). Most of these rely on a tub of water at the bottom, heated with a repurposed electric water heater element. So, I decided we should try to build one and see if they were as great as everyone said.
I was mostly able to use scrounged materials we had laying around from previous construction projects, but we did have to buy a couple of parts. We started out by buying a used Metro Rack shelf, the kind with adjustable chromed wire shelves held up by four chromed steel pipes. We got ours from a restaurant supply store, but these are so ubiquitous now that you could also get something similar at many places that sell storage shelves. The shelves on the one we got weren’t wide enough to carry the full 20” length of a 1020 tray, but we just hang them over the edges as you can see in the photo.
The other thing we bought was a 300-Watt titanium aquarium heater with a thermostat. We put that in an old dish tub filled with water on the bottom shelf. The heater only draws 2.5 amps of electricity and is turned on and off by the thermostat. We hang the temperature probe in the air inside the germination chamber, so the water heater only turns on when the air temperature drops below the set point (we set ours at 70F). These two purchases set us back about $45.

This is a loaded view of the germination chamber near capacity. You can see the dish tub with the cord for the aquarium heater sticking out on the bottom right. The pink foam top is visible in this photo, and the thinner mylar backed insulation for the sides and bottom are also visible. I’ve taped over the cut edges of the thinner insulation to reduce wear.
To enclose and insulate the whole thing I built a box out of scraps of stiff foam insulation board and taped it all together. The only tools I used to build the whole thing were a utility knife and a metal yard stick to measure and cut straight edges on the foam board pieces. To join the sides to the top I simply used wide construction tape, the kind used for taping insulation boards together.
I taped the full length of every edge, both inside and out. In retrospect it probably would have been a little easier to work with the tape if I had first pinned the foam pieces together with nails (you can just push nails through – more on that later), but I just had a helper hold things in place as I taped each seam and before using a full length piece of tape I used short ones to hold the pieces together.

The top of the box is stiffer, 2” thick pink foam insulation. Basically, the rest of the box hangs from the top and the top rests on the top of the shelf legs. For the sides and bottom I used thinner 1” foam with reflective mylar on the inside. I made holes for the four legs of the shelf, so the bottom insulation panel sits off the ground. The thinner insulation is probably not stiff enough for the top, but it has worked well for the sides and the door panel.
The “front” of the box I left open and instead of an attached door I simply made a removeable panel with edges that overlap the box. This door is super lightweight and in a tight space it’s easy to take on and off for full access to the interior. When it’s on I simply pin it in place with two 16 penny nails through the top and two through the lower sides (bits of nylon cord attached to the nails keeps me from losing them).
When I first built the chamber, I considered it a prototype and fully expected to build a more solid one if it worked. Two years later it’s not showing any signs of significant wear and even if I did have to rebuild the box it only took about half a day to put the whole thing together the first time and I’d guess it would take half that to do a second one. Our farm is very small so we didn’t need a lot of capacity, but the one we built could easily be sized up, probably with no need for a larger aquarium heater.
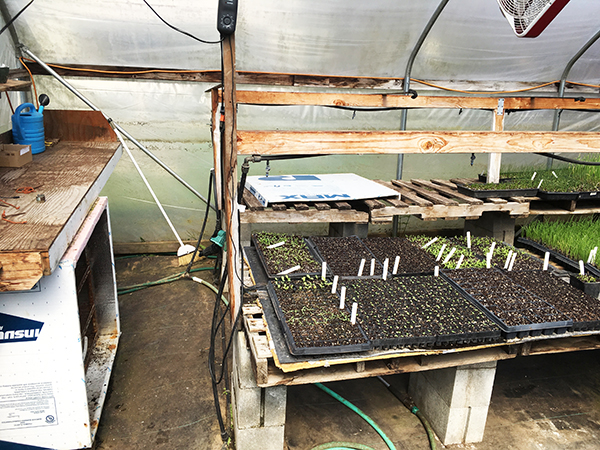
The finished germination chamber sits below the seeding bench in the greenhouse. Shown here with the door off, you can see the door panel sitting on the pallet bench in the background. All photos courtesy of the author.
The one part that failed was the plastic tub when we forgot to fill it for a week. The water evaporated and the heater burned a hole through the plastic. I replaced the tub with an old stainless pot I had sitting around and we’re much more careful to keep the water full now. Folks told me they use oil instead of water to keep this from happening, but other than that one event we’ve never come close to forgetting. Having an automatic fill is another option but, in our situation, it would introduce both more cost and other potential problems, so I haven’t gone that route yet.
To use the germination chamber, we water our seed trays just after seeding and then stack them on the shelves right on top of each other. We make sure to pull them out before they germinate; about 3 days for most things, but a few slow crops might stay in a week. You can see in the photo that the cabinet fits up to 30 trays if we really push it, and 11 trays if we’re not stacking.
The insulated space seems to have helped with summer germination a little as well and my theory here is that it’s protecting the seed trays from our daytime high temperatures and keeping them evenly moist. The germination chamber definitely is as good as I was hearing from everyone, and it’s definitely improved the speed and consistency of germination in our greenhouse while saving us bench space and water.
Post your favorite farm-made tool on social media using #toolsforgrowingformarket. If Josh picks your tool, you win a $50 tool gift certificate and a Full Access sub to GFM!
Josh Volk farms in Portland, Oregon, and does consulting and education under the name Slow Hand Farm. He is the author of the book Compact Farms: 15 Proven Plans for Market Farms on 5 Acres or Less, available from Growing for Market. He can be found at SlowHandFarm.com.

 If you’ve been a subscriber to Growing For Market (or even if you haven’t), you’re probably familiar with the many advantages of no-till agriculture. No-till methods can reduce a farm’s carbon footprint, promote complex soil biology, and preserve and build organic matter.

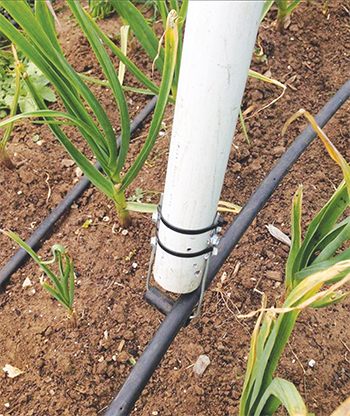 When I saw this tool I knew the exact need that inspired its creation and I loved seeing the abundant comments from other farmers around the world who had also created their own versions, born of that same common need. Nat Wiseman from Village Greens of Willunga Creek near Adelaide in southern Australia posted a very simple and relatively quick fix to the problem of laying drip lines in garlic after the canopy has already filled in.

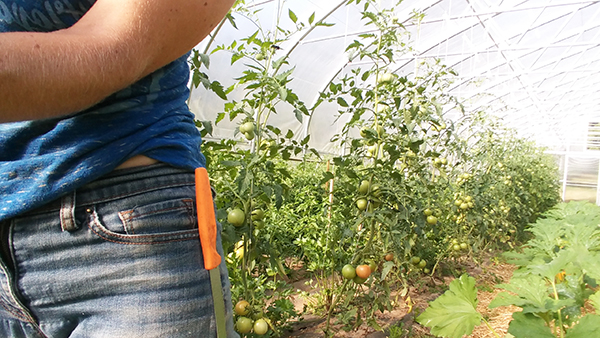 Another simple and relatively inexpensive tool drew me in on social media this month – a magnet in the place of a knife sheath submitted by Kat Johnson, the Produce Manager at Fields Edge Farm in Floyd, Virginia.
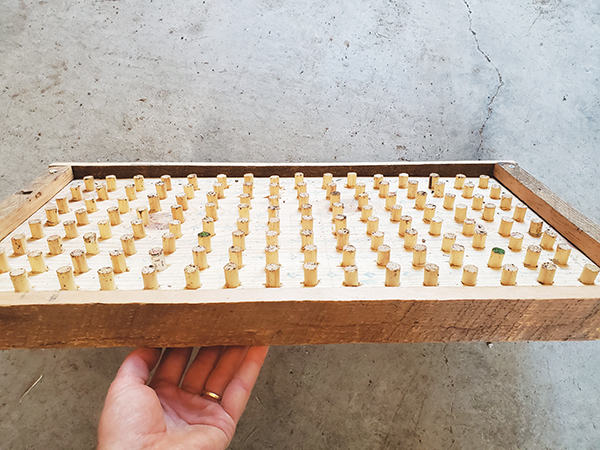 Megan French from Boundless Farmstead near Bend, Oregon, posted these dibblers she built on Instagram and reminded me that I need to get my act together. On their farm they’re typically seeding 30 to 100 trays per week with a vacuum seeder. To get evenly dibbled holes before making the dibbler boards they were using a single bolt with a nut and washer to set the depth. One. Cell. At. A. Time. Which understandably was slow.

 Here's a system to track all those details


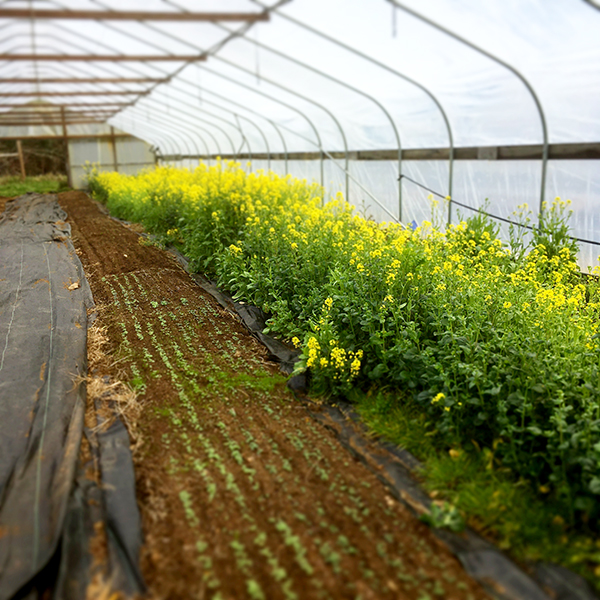
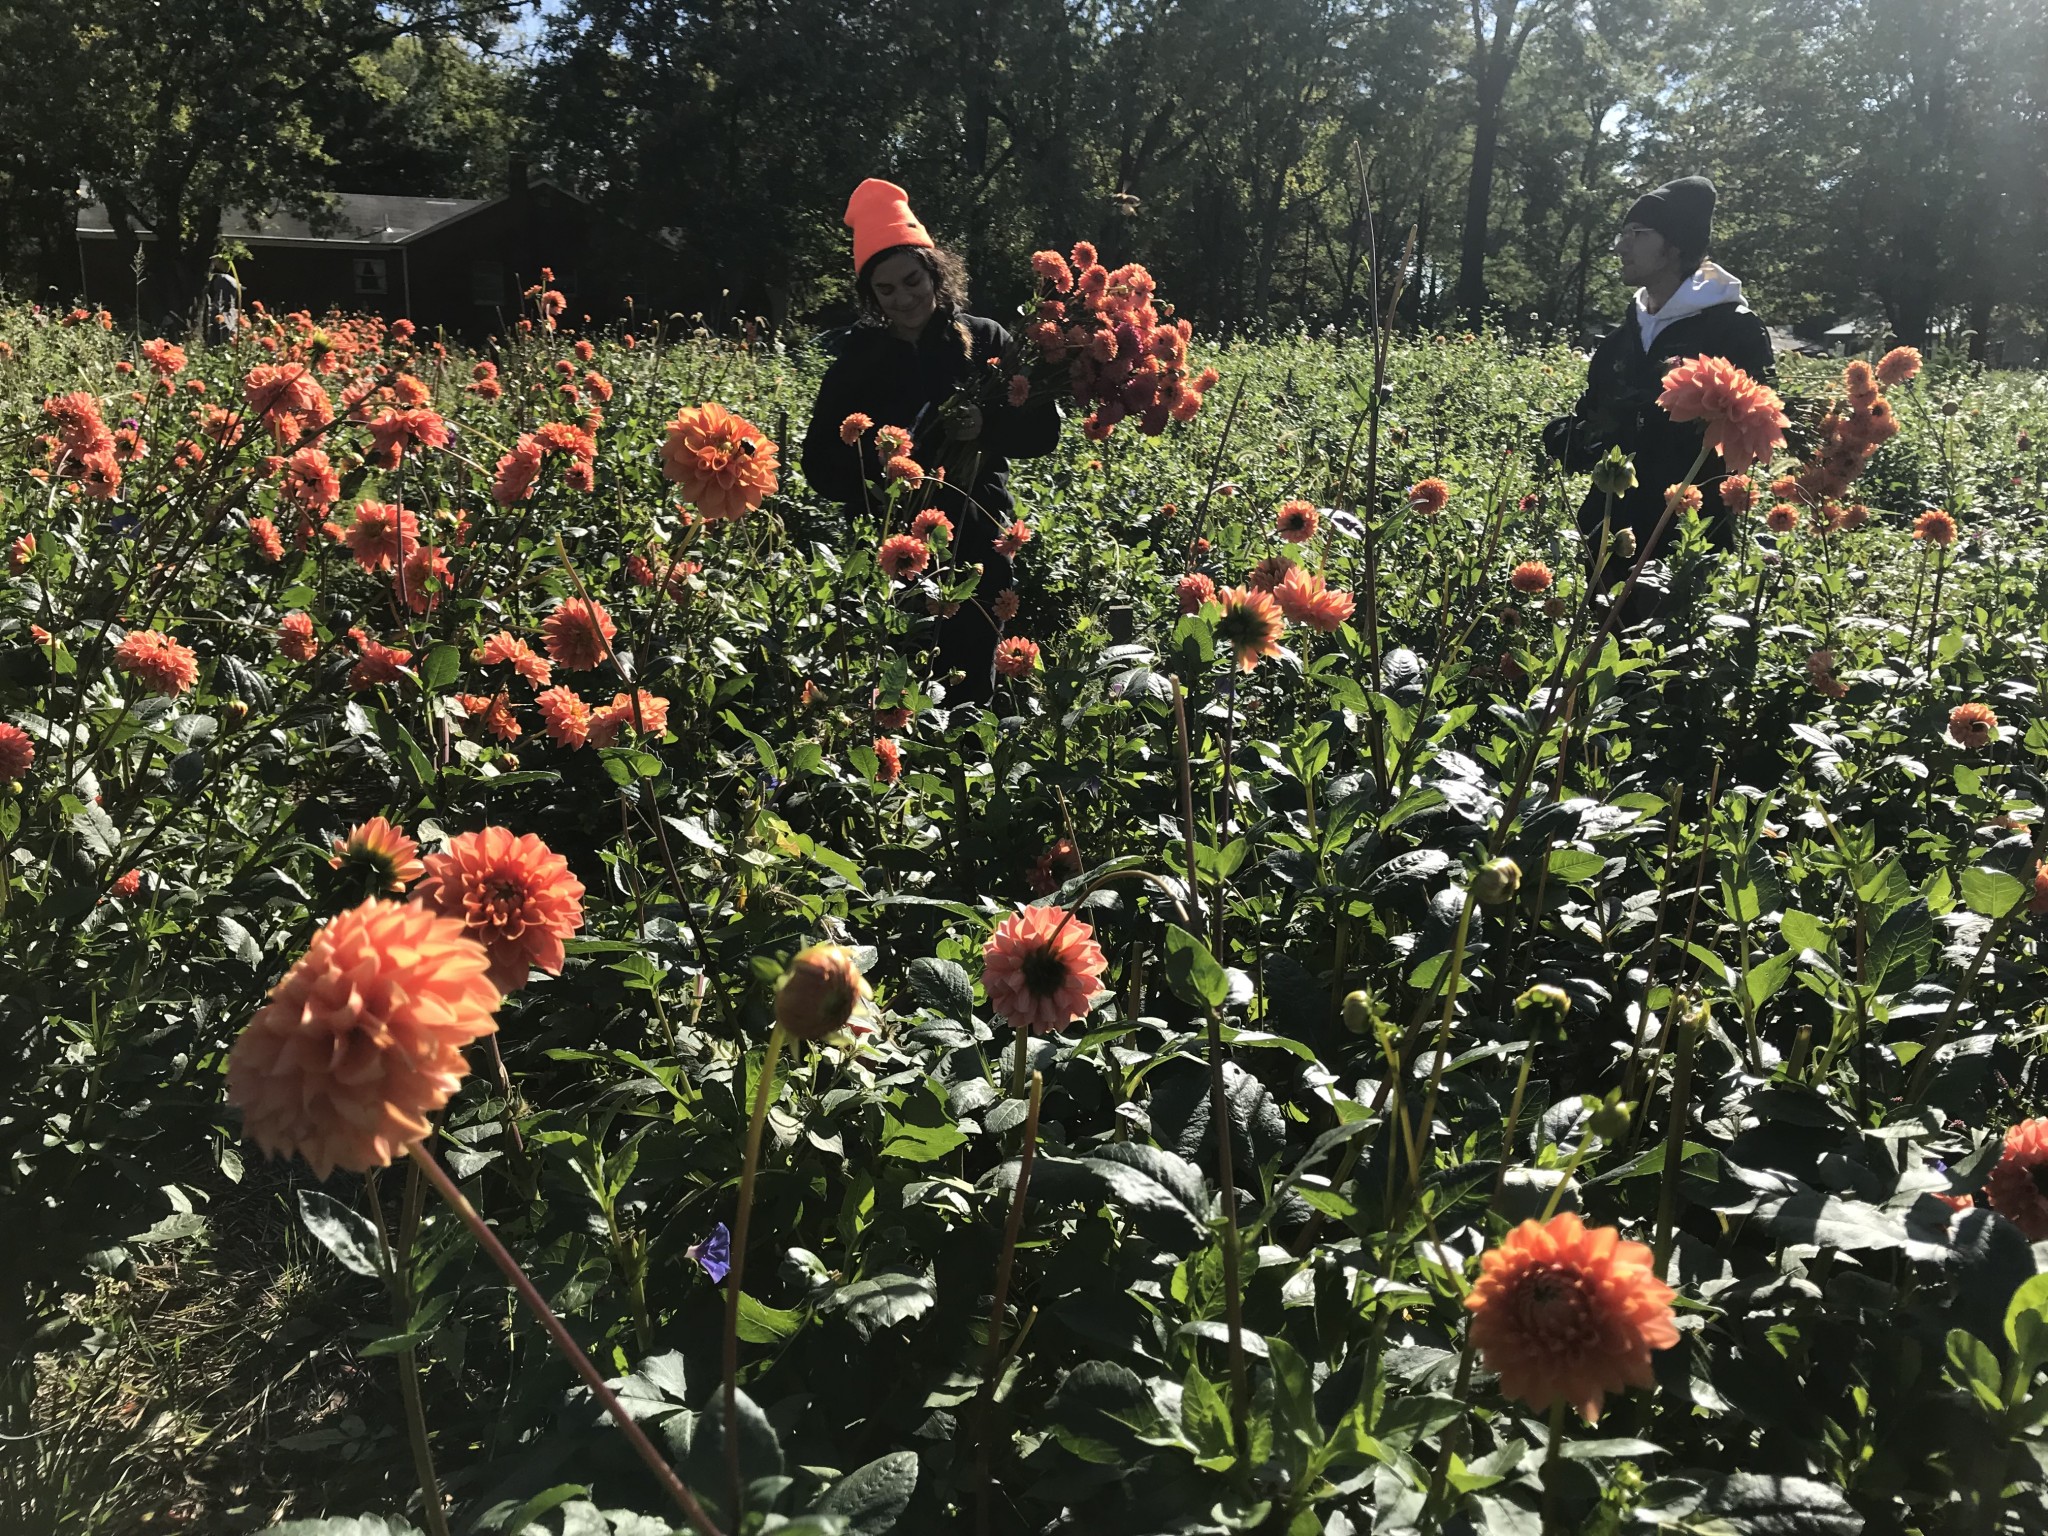 Dahlias were our number one crop this year, even beating out lisianthus and ranunculus by a landslide. We have tried many different methods of growing them, and these are the solutions we’ve come up with. I’m sure there are still better ways, and if you know of any, definitely send them our way! This year we planted 7,000 dahlias and plan to plant even more next year as we increase our growing space. Let’s just start at the beginning with planting and work our way through the whole process.


