Consider growing more perennial crops
Fall is a good time to plan and prepare for new perennials. I grow perennial vegetables and fruit to spread out the harvest season, to avoid overload in the fall and to provide work during the slower season.
Perennials are good no-till crops, sequestering carbon in the soil, reducing erosion, increasing soil water-holding capacity, reducing fossil fuel use, and enhancing soil life and biodiversity. Asparagus, in particular, is best not tilled, as root damage reduces yield increasingly over time.
 A freshly mulched asparagus patch in April. Photo by Kathryn Simmons.
As an early harvesting crop, asparagus provides fresh produce to start your CSA or market season, or get in early with restaurants. Asparagus plantings can remain productive for 15 to 25 years, so long-term thinking is important. Plant asparagus crowns in the early spring to give them as much time as possible that first year to grow strong roots.
Choosing varieties, buying plants
While old OP varieties are still available, newer all-male hybrids yield far more heavily, often more than twice as much. We chose Jersey Giant, a male hybrid resistant to asparagus rust and well-adapted to the mid-Atlantic. It produces big, tender, succulent spears each spring.
Most growers purchase two-year-old crowns, although it is possible to grow your own asparagus from seed if you can find seed of your preferred variety. When in full production, four or five years after planting, yield should be at least, and probably considerably more than, 1/2 lb (220 g) per crown.
Preparing the patch
As with most perennials, careful preparations are needed to achieve good plant vigor and crop yields. Asparagus does well in most soils, from sandy to clay, provided the organic matter is high. Use compost, organic mulches and cover crops to increase the organic matter. Be sure good irrigation is available. Get a soil test in the fall before planting. Amend to a pH of 6.0 to 7.5 and add potassium or phosphorus if needed.
Pick a location that makes weed control easy. This is vital for successful asparagus production, so deal with perennial weeds before you commit to a particular area. Dig up any wild asparagus nearby, as it could harbor asparagus pests. We failed to notice honeyvine milkweed (Ampelamus albidus or Cynanchum laeve) running through our most recent patch. Its roots became terminally twined with the asparagus roots, contributing to the end of that planting after 15 years.
Asparagus is easily invaded by grass, and weed seeds can blow in from un-mowed edges. The year before planting, control annual weeds by covering the soil with a series of weed-smothering cover crops such as buckwheat, or by making several cultivations, or by using tarps.
If you don’t want to spend a whole year preparing your site, start in the early fall before the planting year with an area already in vegetable production and sow a cover crop that winter-kills. Oats winterkill in most of zone 7 or colder and survive in zone 8 or warmer. The end for oats is around 10°F (-12°C), depending on their size and the frequency of cold temperatures. Large oat plants winter-kill after three days at 20°F (-7°C) or colder. Young oats are tolerant to temperatures down to 12°F (-11°C), until the five-leaf stage, as the growing point is still underground. Once the plant starts to make noticeable vertical growth and form nodes (22 to 36 days after planting, depending on variety, sowing date, and water), oats can die at 24°F (-4°C).
The space between rows could be as little as 18” (50 cm), or as much as 60” (150 cm) — more if tractor access is required. Avoid running tractors directly over the rows, as you may damage the crowns. We use the 60” (150 cm) spacing, allowing us to unroll big round hay bales for mulch.
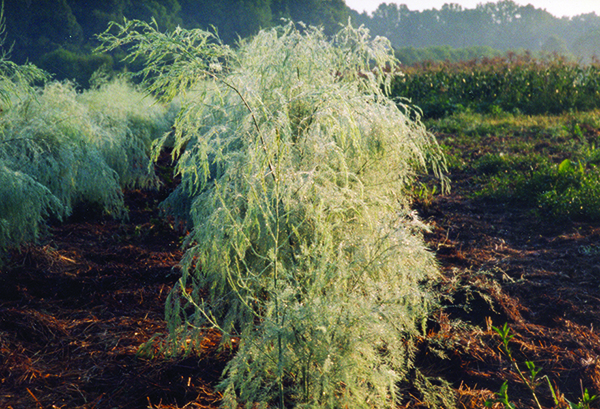 Asparagus rows ferned out early in the summer after harvesting has stopped. Photo by the Twin Oaks Community.
Older books recommend planting asparagus in 15” (38 cm) deep trenches, but trials have shown that yields are heavier from asparagus planted at a depth of 4” to 8” (10-20 cm). Make trenches 6” (15 cm) deep in clay soil, 8” (20 cm) in sandy soil, and spread 2” (5 cm) of compost in a ridge down the middle of the trench.
Research has shown that crowns planted deeper migrate up through the soil, settling at 4” (10 cm) after 10 years. When we planted asparagus in 1995, we followed advice to create trenches 12”, 15” and 18” (30, 38, 45 cm) deep. The theory was that the shallower rows would be harvestable first, and the deeper ones would extend the harvest. This turned out to be a fanciful notion; all were ready at the same time.
Planting
The best soil temperature for planting is 50°F (10°C). Planting in cold soil encourages disease and offers no advantage. Remove shipped asparagus roots from the box on arrival and untie the bundles. Do not water them. If you need to store the roots longer than two weeks, spread them in trays or crates, in a cool, fairly dry place, until planting conditions are right.
Modern hybrids need more space than the 12” to 15” (30-38 cm) recommended for older varieties. Place the crowns 18” (50 cm) apart in the row with the roots spread out, on the ridge of compost in the trench, and cover promptly with only 2” (5 cm) of soil. Cover the crowns before they dry out, and do not compress the soil covering the crowns. As you plant, keep the crowns damp in covered buckets.
Small spears will usually appear in one to two weeks. Let them grow and fern out. Cultivate between the rows and around the plants, pulling a little soil into the rows each time. After the last frost, you can sow buckwheat between the rows to smother weeds. You can mow or till it in about six weeks later when the asparagus spears are 8” to 10” (20-25 cm) tall, finishing filling the trenches at the same time. Be careful not to till too close to the plants to avoid damaging the crowns.
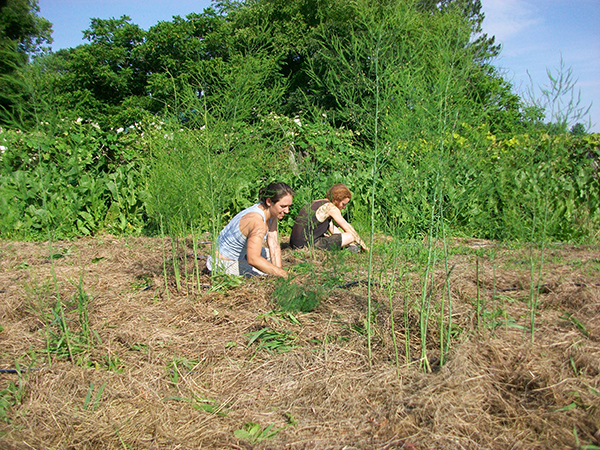 Weeding a young asparagus patch soon after the end of harvest season. Photo by the Twin Oaks Community.
Mulch between the rows with a 3” (7.5 cm) deep layer of hay, straw, wood chips, sawdust, or tree leaves, possibly with an underlay of newspaper or cardboard. Keep asparagus weed-free by hoeing weeds while they are small, or by other very shallow cultivation. Asparagus develops many shallow feeder roots extending a foot (30 cm) from the crowns, and damage to these roots reduces yields.
Consider planting an insectary area in your asparagus patch, to attract ladybugs and lacewings (see the ATTRA publication “Farmscaping”). Planting tall sunflowers in the rows can encourage predators to eat pests, add visual interest, and mark progress when you are harvesting. Other beneficial flowers include yarrow, phacelia, alyssum, and borage.
First year
Trials now show that asparagus yields more long-term if it is lightly harvested for two to four weeks in the first year after the planting year in contrast to previous directions to wait three or four years. Stop harvesting after four weeks at the most, as soon as the thickness of most of the spears is less than the size of a pencil.
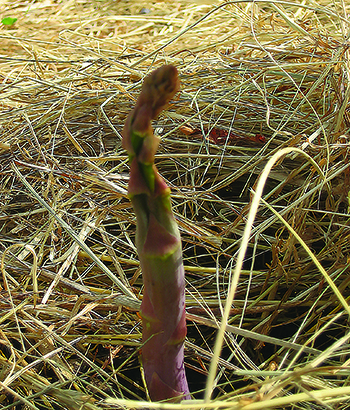
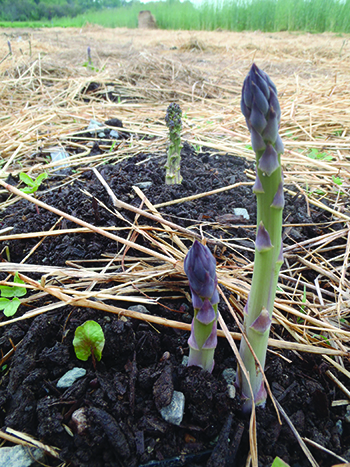 The asparagus patch after spears start to emerge in April. Photo by Wren Vile.
After the first (short) harvest season, let the spears grow tall and fern out. The photosynthesis of the ferns feeds the crowns and strengthens them for next year’s growth. Established asparagus is fairly drought-tolerant, but immature plantings need 1” (2.5 cm) of water each week. By the fall, ferns will be 4’ to 5’ (1.2-1.5 m) tall. Apply compost every year in the fall or winter.
Second and third year culture
The harvest season usually begins for us in early April. In late February or March, we weed, spread compost (if we didn’t do it in the fall) and mulch to a depth of at least 3” (7.5 cm). Harvest for perhaps five or six weeks in the second year after the planting year. Stop picking when the thickness of most stems is less than a pencil. By the end of this second harvesting season, the asparagus ferns will likely reach a height 6’ to 8’ (1.8-2.4 m).
In the third and future production years, pick asparagus for perhaps six weeks, stopping when the spears are thin. By the fifth year you should reach a maximum harvest season of eight to nine weeks.
Asparagus harvest
Cutting asparagus below the soil surface risks damaging emerging spears. I recommend snapping them at ground level. Harvest in the early morning, if possible, as the spears are easier to snap before they warm up. Snapped asparagus is almost all tender and usable. The tough lower ends remain in the soil. If you expect a frosty night, harvest all spears, regardless of size, as they will otherwise freeze and be wasted. We have sometimes done a second (afternoon) harvest, if we’ve noticed a cold forecast. During the harvest season, ensure the asparagus gets 2” (5 cm) water each week.
At the beginning of the season, when the weather is cooler, spears can grow to 9” to 10” (22-25 cm) before ferning out, but in warmer weather, they will open out at a shorter height. So, expect to harvest shorter spears in warmer weather. To keep life simple, we tell our crew to pick any spears 7” (17 cm) or taller. You may prefer to change the required length according to the temperature. Harvest anything of the right length, regardless of thickness.
For pest management, we pick and discard skinny, tough spears, and any that are ferning out. Slender stems are not more tender than large ones, quite the contrary. We harvest the entire patch every single day as a way of controlling asparagus beetles. No spears are left long enough to leaf out, and beetle eggs are removed (on the spears) and cannot hatch. The eggs are harmless, and can be washed off after harvest by spraying with water, or tub-washing.
We harvest into short buckets so that the spears will be standing on end when the bucket is upright. We add a small amount of water, to keep the spears fresh, and hurry the buckets to a cooler at 34° to 40°F (1°-5°C).
 Asparagus spear showing deformation caused by asparagus beetle feeding. Photo by Kathryn Simmons.
Asparagus maintenance
Maintenance and care of perennials happens in the slower season, and the exact timing is not crucial. We’re in zone 7, and we usually tend the perennials in November and early December, then we take a break, and come back late in January. During the main growing season, jobs like weeding can be filler jobs for gaps, good tasks to tackle after heavy rain because we won’t sink in the mud of mulched paths.
One of our first jobs in late January is to weed the rows, give the plants compost (if not provided in the fall) and then mulch between the rows. We leave the rows themselves unmulched, so that the soil there will warm faster. The mulch does slow down the warming of the area, and probably delays harvest, but we prefer the no-till system, which avoids the damage to the asparagus roots that tilling can do.
Soon after the harvest season is over (April and May here), and before the ferns are too large, we weed and mulch again, tucking the mulch around the plants. In the fall, after several frosts, the asparagus ferns die, turning brown. Mow the ferns at ground level and compost them to destroy asparagus beetles and diseases that overwinter. Some growers do a controlled burn of their asparagus patch, rather than cut and haul the ferns.
We do soil tests in October and respond with amendments if needed in late winter or early spring. At the end of each harvest season, in the fall or winter, we give some compost or other organic fertilizer in preparation for next year.

Asparagus beetles
Asparagus beetles chew the spears and can do serious damage to new plantings and cause established patches to deteriorate. The chewed spears can twist into an unsellable hook shape. There are two species. Adults of the Common Asparagus Beetle (Crioceris asparagi) are 1/4” to 1/3” (6-8 mm) long, slender beetles, metallic blue-black with wing covers each having three or four yellow-white square spots and reddish margins. The thorax is red and usually has two black spots. The Spotted Asparagus Beetle (Crioceris duodecimpunctata) is more common in the West, and mainly feeds on female plant berries, so is a smaller problem on the berryless all-male hybrids. The adult Spotted Asparagus Beetle is slightly larger than the Common Asparagus Beetle, about 1/3” (8 mm) long, orange with 12 spots on its wing covers.
I have seen a few in Virginia, where they emerge one to three weeks later than common asparagus beetles. Antennae of both beetles are about half the body length. Larvae of both species are olive-green to dark gray with black heads and legs. They develop into plump, hump-backed larvae about 1/3” (8 mm) long. Eggs of both species are shiny black rods 1/8” (3 mm) long, (about the size of a hyphen) attached by one end to the asparagus spears, giving badly infested spears a bristly appearance.
Good descriptions of both asparagus beetles, along with detailed photos of all life stages, and a parasitic wasp attacking an egg, can be found on the University of Minnesota Extension page at tinyurl.com/e7r7e2. The adult beetles overwinter in crop debris and soil, emerging in April to lay eggs that hatch three to eight days later. The larvae join the adults feeding on the spears. Larvae mature through four instars (in eight to 14 days), then enter the soil and pupate, emerging as adult beetles in five to 10 days. Later in the season, these new adults lay another generation of eggs. In Virginia there are two generations per year. In warmer climates, as many as five.
Minimize beetle over-wintering sites by cutting and composting ferns each year after winter frosts turn them brown. I prefer doing this right away, rather than in spring. Some growers flame the cut stem residue in the spring, but if you have mulch, it’s probably wisest only to do this after heavy rain or overhead irrigation.
As well as daily observation while harvesting, it’s good to intentionally scout asparagus beetles once a week from the beginning of the harvest period. Inspect 15 to 20 crowns at four different parts of the field. During the harvest period, the action level is five to 10 adults per 100 crowns or 2 percent of spears infested with eggs. In the post-harvest period, the action level is five to 10 adults per 10 crowns. If control measures are not taken with infestations above these action thresholds, permanent damage to the plants may occur.
Cultural control
Harvesting all spears above a certain length every day removes all the eggs, and hence breaks the lifecycle. Asparagus beetles are a threat mostly in the first six weeks of harvest. By harvesting for more than six weeks you are gaining control.
The adult beetles can be hand-picked and crushed while harvesting, especially if temperatures (and the beetles) have not yet warmed up. Once the day has warmed up, they are better at eluding capture by dropping and hiding, or flying off. Creep up on them; they drop to the ground if they sense a threat.
Biocontrol options
Birds may eat asparagus beetles and larvae for the extra protein, which appears conveniently during nesting season. Ladybeetles, lacewings and a Chalcid wasp are predators of the eggs, and ladybugs and lacewings also eat the young larvae.
There is a tiny black Eulophid parasitic wasp, Tetrastichus asparagi, which eats the eggs early in the season, and parasitizes them in the summer. This is not commercially available, but it is generally found wherever asparagus is grown.
For bad infestations, you could introduce beneficial nematodes. These microscopic soil organisms will destroy asparagus beetle pupae right in the ground. You need warm weather and damp soil for nematodes to survive.
Some growers install temporary fencing and run chickens in the patch for a short time after the harvest period to eat bugs. The poultry will not find food for long if the asparagus patch is clean of weeds. Watch for soil scratching, and move the chickens out before they uncover the crowns. Ducks and geese are less likely to dig. If you have USDA Organic Certification, read the small print about animal manures and vegetable crops.
As a last resort, botanical insecticides are an option. The daily harvest makes treatment difficult because few want to spray anything close to harvest time. Insecticidal soap may be effective against larvae. Grandevo CG is OMRI listed against asparagus beetles. It is a bacterium with spent fermentation media. Spraying in the afternoon is recommended as the time when the beetles are most active. It also allows the most time before the next morning harvest. The pre-harvest interval (PHI) is 0 days. I have not used it myself.
Spinosad (also OMRI listed), is a naturally occurring bacillus derived from a soil bacterium. Spinosad products such as Entrust (Monterey Garden Spray for home gardeners) can be used to control many insects, including asparagus beetles.
Diseases
Asparagus Wilt is caused by verticillium and fusarium fungi invading the roots and stems. It causes the spears to wilt at a few inches (8 cm) tall. Fusarium Crown Wilt can cause the gradual but terminal decline of an asparagus patch. Rust appears as yellow and orange spots on the fern needles of varieties not rust-resistant. Needle Blight can appear in June as buff and gray elliptical spots with a purple border. Purple Spot is another disease that appears on young spears.
Older books suggest broadcasting salt in the early spring to combat diseases or weeds, but nowadays this is seen as detrimental to the long term health of the asparagus, and the soil, leaching in wet weather, or increasing salinization in dry weather.
Pam Dawling’s books, Sustainable Market Farming and The Year-Round Hoophouse, are available from Growing for Market. Her weekly blog is on her website and on facebook.com/SustainableMarketFarming.


