This article originally ran in the January 2021 issue of Growing for Market Magazine.
What if I told you this fall you could plant Dutch shallots, and harvest perfect overwintered scallions at the end of April? It’s easy. You just have to stretch your imagination a little. This article shares my wonder and amazement for shallots as a multi-yielding crop.
Fields Edge Farm has raised Dutch shallots for a few seasons now. We typically plant them in October as we do our garlic. Here in Floyd, Virginia, hardiness zone 7a that means October 20th, but later plantings work too if you have a window where you can get them in. We make sure to split the lobes of each cluster apart as much as possible to prepare the sets for planting.
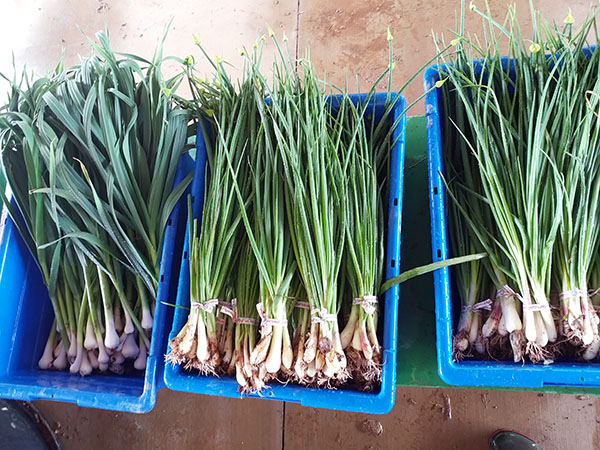
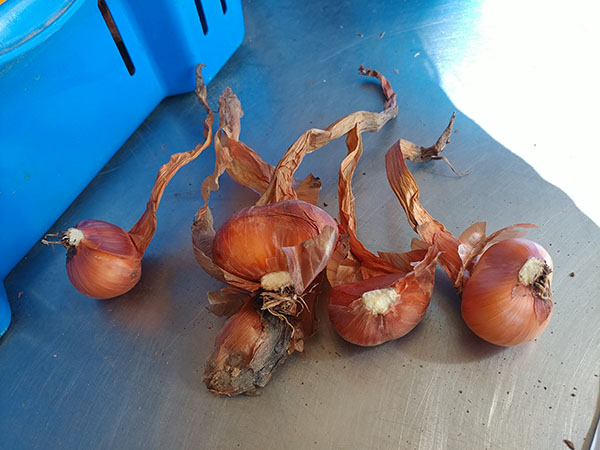
Shallions that were bunched in the field, along with green garlic in the tote on the left, coming back to the pack house to be hosed off.
During the splitting process (much like cracking garlic, but easier), I pull out a scale and weigh a random sample to see how many pieces are in a pound. Then, I do the math to see how many pounds we will need to fill our prepared bed. It usually takes about 15 lbs of shallots to plant one of our 125’ beds. However, this is relative to the size of your shallots, which can vary from 20-50 seed pieces per pound.
On our farm, we plant by hand, pushing the shallot down into a hole in the plastic mulch made by a dibbler and burying it with ½ inch of soil so that the stem is usually still visible, but the bulb is buried. We set the dibber to punch holes every 10 inches with three rows per 30-inch wide bed. To prepare the soil, we treat our entire allium plot based on Cornell’s Organic Garlic Fertility Recommendations and customize it based on our most recent soil test.
There are a few different types and ways to grow shallots. Growing Dutch shallots, Allium cepa var. aggregatum, has been a nice addition to our farm’s product line because it is a specialty product and not a cheap commodity like onions. One way to grow Dutch shallots is from seed started in a greenhouse and planted out around the last frost. Growing shallots this way yields beautiful large individual bulbs, more reminiscent of an onion in size and habit.
Growing shallots from sets, like we do, is slightly different. It usually yields more weight per plant in the form of a cluster of many smaller shallots compared with the singular bulb of those grown from seed. One benefit of planting sets is not having to heat and water flats in the greenhouse.
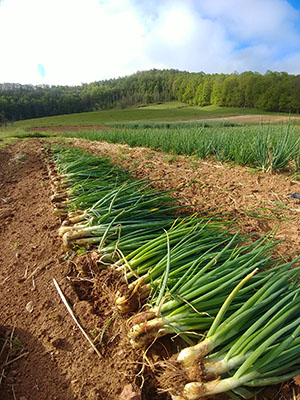
Shallions harvested in mid-May. A knife is used to trim the roots off the shallots as they are bunched with ties in the field. Photos by the author.
Also, selecting your planting stock over time helps the crop adapt to your farm’s climate. Dutch shallots are slightly different from French shallots, Allium oschaninii, also known as ‘true shallots,’ which are smaller and more difficult to clean and peel. I haven’t tried growing them in the same manner as I describe here.
In previous seasons my goal has been to produce shallots to a surplus and store most of them for wholesaling through the winter. However, I grew weary due to a dropping price point and the amount of sales work it took to get the entire crop sold. Wholesalers were typically offering $3 per pound and farmers market customers weren’t clamoring for them in pint containers for $3.
Due to my high production costs in previous years (26 labor hours per bed), I was determined to make shallots more profitable this past season. I tried to increase production per bed foot by adding a third row per bed and limited the amount of sorting and cleaning we did before sending them to market. As a result, I brought labor inputs per bed down to 16 hours. My beds are 125 feet long, and I was able to get about 225 pounds of bulbs per bed.
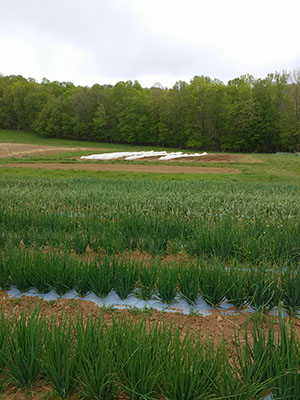
Shallots planted into biodegradable plastic, three rows per bed with a 10-inch in-row spacing in mid-May.
Shallots need to be cured for long-term storage. Curing shallots can be done exactly the same way as garlic. However, I have found them to be much more forgiving than garlic in our climate. We live in a humid, rainy area and often don’t get around to harvesting on a perfectly dry week. But that’s okay with shallots, and we are able to dry them on wire racks without fans in an open air shed.
We have even been able to harvest them on a rainy day, lay them out in an open air barn and still get good results. A good indication that shallots are fully cured is when all the wrappers are papery and dry, and the stalk has no moisture in it, usually after at least 2 weeks on a mesh rack.
This year, to streamline the harvest, we decided not to trim roots off (everyone does that at home anyway) and to trim the tops off in the field before bringing them in. After curing, sloughing off a layer of skin is a quick last step before sending them to market. We store them in a 50°F room for most of the summer to prevent them from sweating when they get to the grocery store. Once November rolls around, we move them to the 32°F cooler to inhibit the urge to sprout in storage.
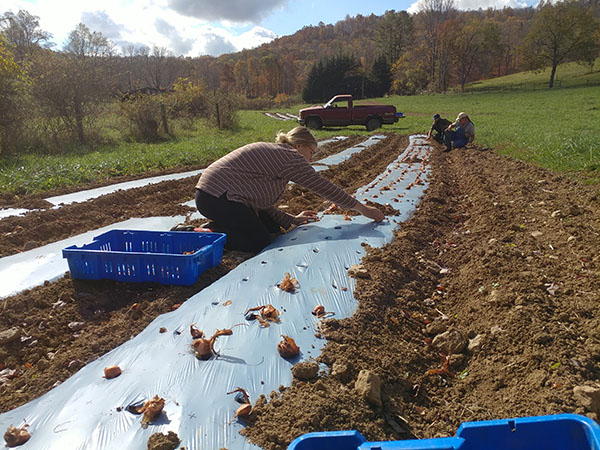
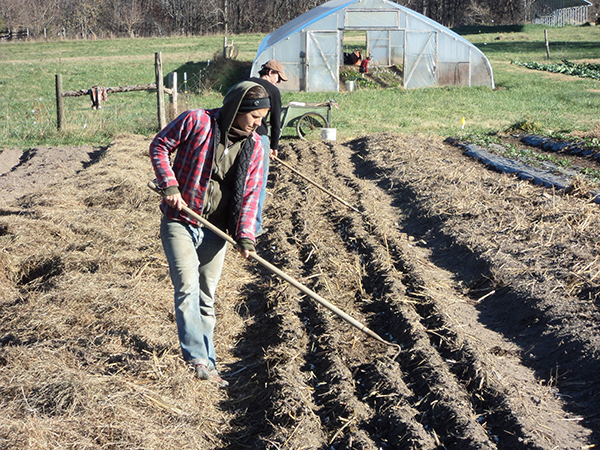
Planting Day, October 20th, 2020. Jason Walker lays out shallots at Fields Edge Farm, the crew follows behind to plant them.
As farmers, we always feel the urge to have crops early in the spring. This past spring the demand for early crops was even higher due to COVID-19. So, I took to the fields determined to find something marketable to advertise to my customers. There it was right before me: SHALLIONS! Shallot scallions are the immature clumps of our fall planted shallot crop. I dug them up and cooked them that night. They were surprisingly crunchy and seemingly superior to the few struggling overwintered Japanese style bunching onions I had in the field.
I listed the shallions on my weekly wholesale list for $2 per bunch, and they flew out the door. I harvested about 600 bunches per bed, bringing in $1,200 per bed (almost twice as much income as bulbs). I think you may be able to charge more, perhaps $3 to $4, at a farmers market and plant them even closer than 10 inches if your goal is to harvest in April and May or use smaller size seed stock from last year’s harvest. By the time the flowering stalks were showing on the plants in June, it became more laborious to clean the roots and make them pretty for market. So, we stopped harvesting and bunching and let the remaining shallots bulb up for harvest at the end of July.
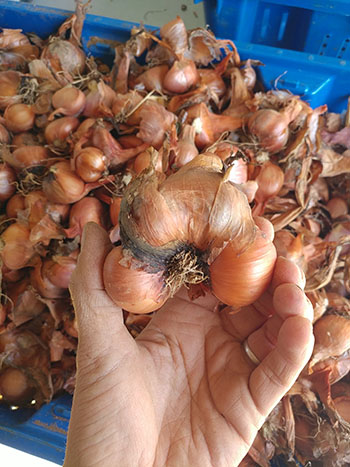
A saved seed shallot before separation into lobes.
I was delighted by how well-received they were by customers. When there was time for explanation, shallot scallions really won people over. However, one of our farmers markets did better with them when we just labelled them with the familiar term ‘scallions.’
Chefs loved their uniqueness, and they even showed some interest in shallot blossoms as edible flowers when those came along. We sold them as edible flowers bunched in long-stem bouquets for 25 cents/stem. They last significantly longer than other edible flowers and can be snipped off the head into tiny little white garnishes with an onion flavor, which is great on savory baked goods or to spice up a Bloody Mary.
Shallots definitely won me over this season. In the field they earned their keep and added more diversity to my crop list, all from a single fall planting. In the kitchen, they added just the right spring flavor. Maybe one day ‘shallions’ will be a familiar term!
Shallot sets separated into lobes, ready to plant.
Kat Johnson is a farmer-preneur living in Floyd, Virginia. She currently manages five acres of specialty produce for Fields Edge Farm and is launching her own salad-centric farm and consultancy this year. Check her out at www.katthefarmer.com


 Garlic is a high-value crop and a heavy feeder. It needs full sun and a good range of available nutrients. Planting in raised beds helps soil drainage, reduces soil compaction and facilitates harvest. Garlic does best in a sandy or clay loam with very good drainage and lots of organic matter. Fall is the best time to add compost or other fertility amendments, such as soybean meal. Avoid over-fertilizing or the growth will be too tender to survive cold conditions, and the storage life of the garlic will be shortened. Avoid soluble nitrogen fertilizer in the fall to prevent leaching into ground water.


