This article originally appeared in the August 2020 issue of Growing for Market Magazine.
My wife, Megan, and I grow cut flowers on half an acre of a twelve-acre property in Hurdle Mills, NC. We are in the heart of tobacco country. When we bought our property in 2013, our sales contract stipulated that the farmer had the right to harvest that year’s tobacco crop. Based on our best guesses, that marked at least the 100th consecutive year of tobacco/wheat rotations on this property. The farmer was kind enough to disc in the tobacco stubble after the harvest.
Then, we walked onto a big, red, muddy, blank slate of a farm. With limited resources, we attacked the overworked clay with everything we had: hand tools, a few wheelbarrows of leaf mold, and a sturdy but ancient rear-tine rototiller. The results were underwhelming.
In 2015, we were lucky enough to learn about no-till from a blog post by Tony and Denise Gaetz of Bare Mountain Farm in Oregon’s Willamette Valley. (See “An Update to Our No Till Experiment,” https://tinyurl.com/y8222hyt.) Tony and Denise have lots of great material on no-till and their innovative farming methods on their web site, http://www.baremtnfarm.com/, and YouTube channel at https://www.youtube.com/baremtnfarm.
We are blessed to be farming at a time when there is a lot of available information about organic no-till farming. With inspiration from Tony and Denise and many other farmers, we developed a no-till method that works for us: basically, a compost mulch method with additional landscape fabric mulch and occultation. Through trial and error, we’ve developed methods that work on our farm for managing our beds and dealing with cover crops. We would like to share these with you, along with what we wish we’d done differently from the start.
We have always sold flowers wholesale to local florists, but for the past two years we only have sold wholesale and only spring flowers. In our current business model, we plant most of our cash crops in the fall and finish harvesting the following June. Moving to this spring-only sales model really improved our lives and our business, but it did have consequences for our no-till system. Particularly, it has made it very difficult to work cover cropping into our rotation.
A year in the life of one of our typical flower beds might look like this:
FALL: Bed preparation (see below): Most beds are planted shortly after preparation, but some are not planted until late winter. If possible, these beds are prepared in the fall and then covered under a tarp (occultation) until planting time.
WINTER: Flowers grow over the winter.
SPRING: Harvest and sell flowers.
SUMMER: Bed maintenance: Typically beds are covered under a tarp with compost added before planting. Sometimes we get a short-season cover crop in, such as buckwheat. For beds that will get flowers planted in late winter, we have time for a longer cover-cropping period. Cover crops are followed by occultation.
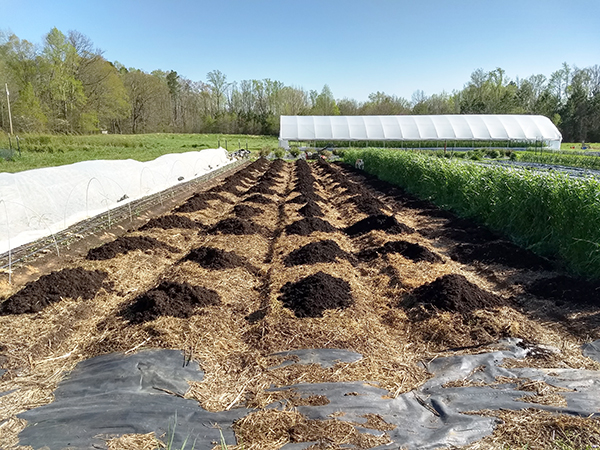
Compost mulch can be used to enrich soil, suppress weeds, and help cover crops germinate.
Occultation
One term you will hear a lot when talking about organic no-till is occultation. Occultation means using a silage tarp or other material to create a dark, moist environment where the soil life can go to work. Occultation is a multi-purpose tool that we use for three primary functions. First, to kill flower plants after harvest and to break down crop residue and roots. Secondly, to terminate cover crops and to decompose them. Finally, to keep a bed in a holding pattern and suppress weeds until we are ready to plant. Breaking down crop and cover crop residue takes a minimum of six to eight weeks depending on the temperature and plants involved.
Managing beds
Without the quick “eraser” of a tiller, managing no-till beds requires careful planning and more time than in conventional farming. It also offers flexibility: We can generally get into the field and do work when it is much wetter than otherwise would be possible.
To prepare beds, first we aerate the bed using a digging fork. We like this tool a lot more than the broadforks we’ve used in the past. The digging fork has advantages in that it is lighter and has thinner tines. In our experience, this means we can actually push the fork all the way into our clay soil, whereas the broadfork only went in about half way. Because the fork is lighter, we can move faster. So, even though it takes two passes to fork the whole bed (one down each side), it takes the same amount of time. Additionally, with the broadfork we had to stand on the beds, walking backwards. With the digging fork, we stand in the paths while we fork, and never step on the beds.
After we fork, we spread amendments. We like to do this after we fork so that the amendments can fall down into the cracks we’ve made. We spread a mix of N-P-K sources and micronutrients based on soil testing and advice from a soil consultant.
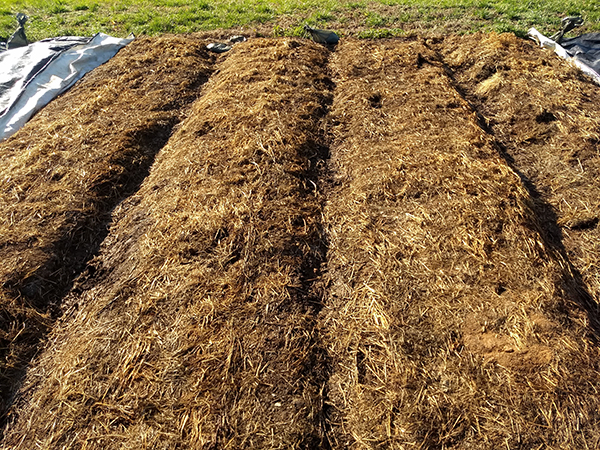
Finally, we spread compost. We used to apply compost before we forked and the forking action helped mix the compost in a little bit. However, we have found that in combination with the effects of occultation, an undisturbed compost layer on top of the soil adds very powerful weed suppression.
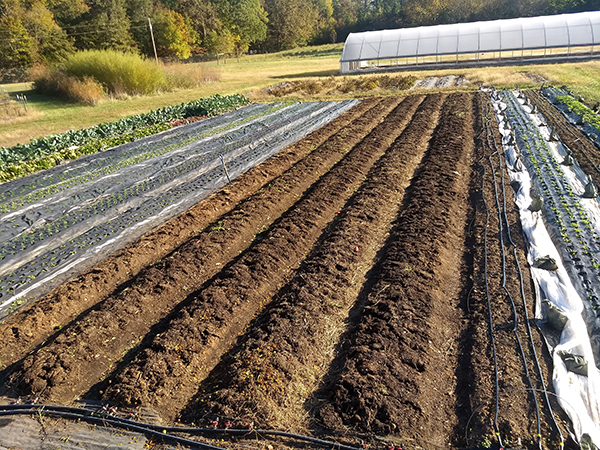
Recently forked beds at Spring Forth Farm.
Our goal is to spread half an inch of compost on each bed each year. While we haven’t always managed this, one development that has allowed us to spread compost more regularly is connecting with an affordable compost supplier. Now, we can conveniently buy by the pickup truck load. Since we don’t have a tractor, we find it much more efficient to just back the truck up to the beds we are amending, compared to shoveling it from a huge pile into wheelbarrows and then carting it around.
After our beds are prepared, we put out landscape fabric with holes burned in it and transplant into the holes. A few crops are direct seeded. When a crop is finished, we often cut the flowers low enough during the harvesting process that we can just pull the fabric off over the stems and then flail mow, leaving the crop residue on the bed. Sometimes with bushy crops, we have to cut off the top of the plant material first and carry it to the compost before we can remove the fabric.
We generally leave the roots in the ground to decompose and cover the bed with a tarp until we plant again in the fall. By the time we are ready to plant again, the roots have mostly decomposed and it is easy to brush aside any stalk stubble in our way. Tarping has even proven effective at killing the roots of crops that would otherwise be perennials, such as verbena and yarrow, although this can take several months.
Cover crop management
For us, cover cropping is the most challenging aspect of no-till. Without a rototiller and discs, getting a good stand of the cover crop and dealing with the residue can be really challenging. Allowing time for the cover crop to grow, plus the six to eight weeks needed for occultation may be impossible if bed space is limited. We aren’t always able to cover crop, but when we do, we have a few strategies for getting the cover crop to germinate. These fall into two categories: shallow soil disturbance and mulching.
Mulching is our preferred method for getting cover crops to germinate because we prefer not to disturb the soil even a little bit. We used to mulch with straw, a renewable resource that came from the wheat crop right across the street. We would sow the cover crop and then spread straw, like we were seeding grass.
We found that this worked quite well with winter cover crops, but did not work well with summer cover crops. One downside, we experienced an increase in slugs. The biggest plus side of this method is the speed. However, we have largely abandoned it as we have started overwintering more and more flowers and have less space for winter cover crops.
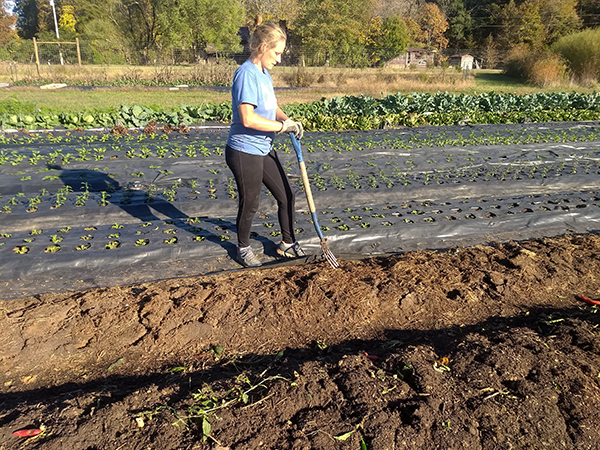
Megan using our favorite tool, the digging fork,
to aerate and loosen the soil. All photographs courtesy of the author.
Alternatively, we are experimenting with sowing our cover crop and then spreading compost directly on top of it to enhance seed-to-soil contact. We are still experimenting with this, but we are hopeful that it will be an effective and efficient way for us to germinate summer cover crops without any soil disturbance.
We also rake in the cover crop seeds by hand or stir them in shallowly with a power harrow at one-to-two inches to get them to germinate. A tilther could also be used for this. This is the one area where we are open to mechanical soil work (in addition to initially forming the beds).
.png)
Both methods are effective, although the harrow is much faster. Both only disturb the soil to a similar depth of about one-to-two inches and don’t invert the soil layers, which is why we feel comfortable using the harrow and still consider ourselves no-till.
Nevertheless, this isn’t something we want to do and we are hoping our compost-spreading experiment proves an effective alternative to raking or stirring in the cover crop seed. Additionally, we have found that even this shallow harrowing brings up a lot of weed seeds.
One element that we have found to be essential for germinating cover crops no matter which method is used is irrigation. While we use drip irrigation for our cash crops, an inexpensive impact sprinkler that we move around the field effectively waters in the cover crop seeds and helps them germinate in our hot summers.
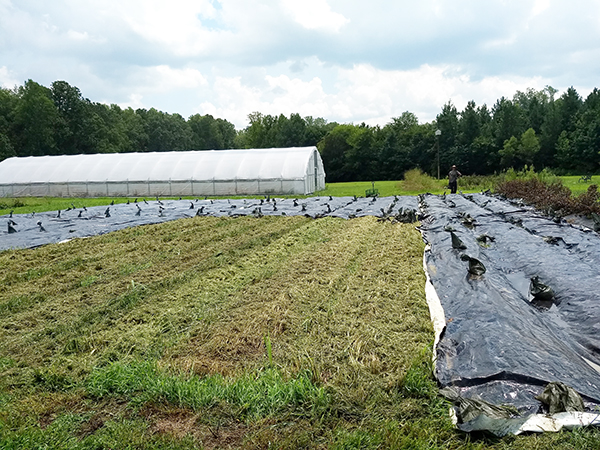
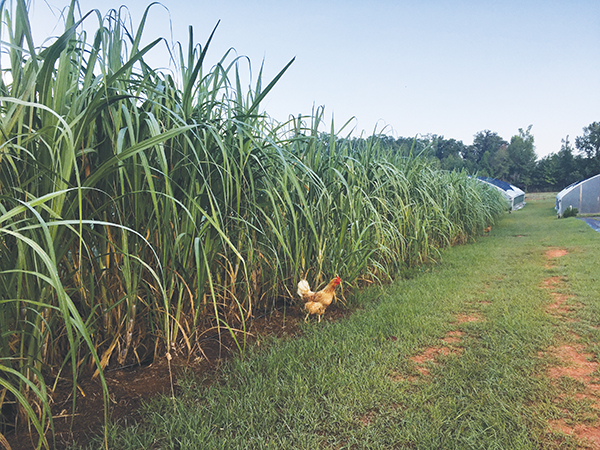
Sorghum-Sudan grass cover crop, flail mowed and ready to for tarping in the fall.
Having a flail mower for termination really improved our ability to cover crop in our no-till system because it chops up the cover crop and leaves it on the bed. Occultation works much better when the crop residue is shredded, especially with fibrous crops such as sorghum-sudangrass or rye.
Even with the flail mower, we allow a minimum of eight weeks for occultation and often longer. We try to wait for it to rain before putting the tarps on and sometimes we run drip tape under the tarps if they will be in place all summer. We take the tarps off right before bed prep and the whole process starts over.
Given the time it takes for a cover crop to grow and then six-to-eight weeks for it to break down under a tarp, it can be difficult to work in cover cropping, especially within limited space. This is made more difficult for us by the long maturity period of flower crops, 90-120 days being quite common. For a long time we were stumped about how to plan our beds until we realized the problem was how wedded we were to cover cropping.
Although cover cropping has many benefits, from keeping living roots in the soil to efficiently adding nutrients and organic matter to the beds, sometimes it just doesn’t fit. When we accepted that we might have to let go of cover cropping some beds and instead add more compost, it made our bed planning much easier.
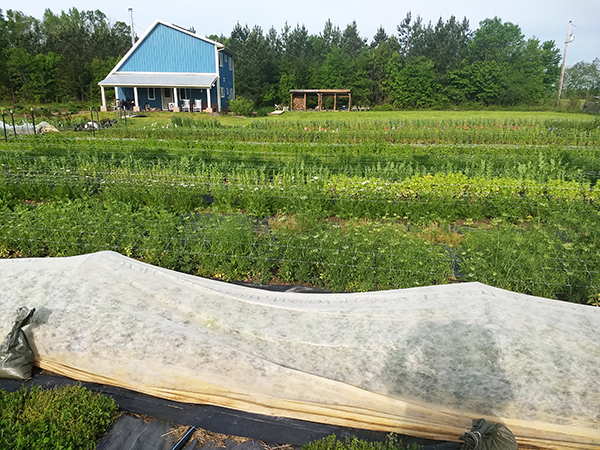
Sorghum-Sudan grass cover crop in the middle of winter
showing how occultation can effectively break down cover crop residue.
The roots are entirely decomposed.
Make your beds right
Like many no-till farmers, when we started our farm we used a tractor to form the beds. In our case, our neighbors made beds for us using their corn-hilling tractor. The beds are too close together for our bushy flower crops. That has cost us a lot of time and broken stems as we have to pick our way carefully between the beds without room for even a harvest bucket.
Additionally, at the time we didn’t have the resources to add the compost we wanted. When we built our hoop house, we added two dump trucks full of compost to the soil, essentially building a farm on top of a farm of our red clay. The crops have thrived in the richer soil.
Several years later, we’ve finally had it with the narrow paths in our fields. We also want to add caterpillar tunnels, which won’t work with our existing bed spacing. So, we are renovating the fields, disturbing the soil for the last time.
We have harrowed down the beds and will disc in sixty yards of compost per one-eighth an acre of field section. We’ll use strings to mark out paths that we can actually walk through with a harvest bucket or a backpack sprayer without breaking our flower stems. We’ll scoop out the paths and raise up our beds. And, we’ll have the fields set up for no-till the way we should have from the start.
We are also taking the opportunity to space the beds properly for future caterpillar tunnels. We expect a flush of weed seeds next year, but we’ll also have tall fluffy beds with room to work. By using occultation, compost mulching, and not disturbing the soil again, we know we’ll get through that weed bank.
Spring flowers at Spring Forth Farm.
Since it costs more to fix things then to get them right the first time, and since so many no-till farmers use tractors to break sod and form initial beds, if it is at all possible, we encourage you to invest the time and money to add more compost then you think you need and lay out your beds and fields the way you want from the start. We could have saved a lot of aggravation if we had done this from the beginning.
We hope you have found reading about our no-till practices helpful. No-till has many benefits, including improved soil health, low equipment costs, and efficient use of space. Setting up your field properly at the start will help you realize these benefits.
When we first started no-till farming, we found the best approach was to learn no-till techniques from as many different farms as possible. We could then trial different practices until we found what worked for us in our unique situation. If you want to see how other farms are doing no-till, we highly recommend Bare Mountain Farm’s resources, the archives of the Farmer to Farmer Podcast, Andrew Mefferd’s book The Organic No-Till Farming Revolution, and back issues of this magazine as good places to start.

When making your beds for bushy crops such as flowers,
plan your bed spacing so you have room to work.
Jonathan and Megan Leiss grow half an acre of no-till flowers on their homestead, Spring Forth Farm, in Hurdle Mills, NC. Megan and Jonathan’s course, The No-Till Micro-Scale Flower Farm is available from The Gardener’s Workshop: www.thegardenersworkshop.com.


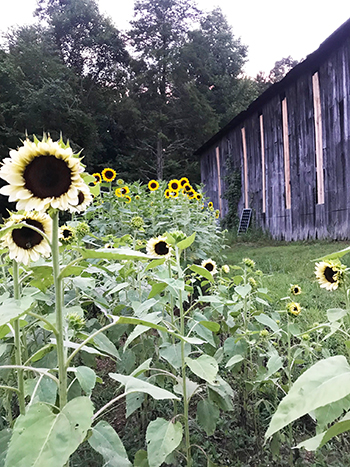
 Julia Asherman appeared on my radar screen a number of years ago because she was a regular presence at the Southern Sustainable Agriculture Working Group conferences where I’ve spoken many times. Colleagues pointed her out to me as a person to watch because she was tough and smart and she was going to make something of herself as a farmer. We became conference buddies. So, when I had the good fortune to get invited to speak at the Georgia Organics Conference in Athens this winter, I knew right away I wanted to take that opportunity to visit Julia at her place, Rag & Frass Farm in Jeffersonville, Georgia.


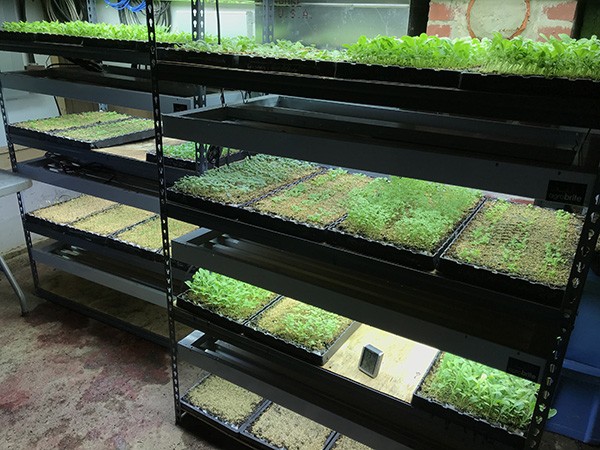 Have you ever lost precious seedlings in your greenhouse to frost? How about tossing a flat or two out due to heat stress or a missed watering? Or better still, stared at a tray of seeds that won’t germinate, with smoke coming out of your ears, because you’re sure someone (not you!) mis-watered them at a critical moment? Have you ever shrugged to yourself reading the growing instructions on a seed packet that says “Germinates best at 70 Fahrenheit” while standing in your 85-90 degree greenhouse? You’ve started to look into a germination chamber to solve some of these issues, but they look pricey and have limitations like not being able to handle as many flats as you’d like to start at once.

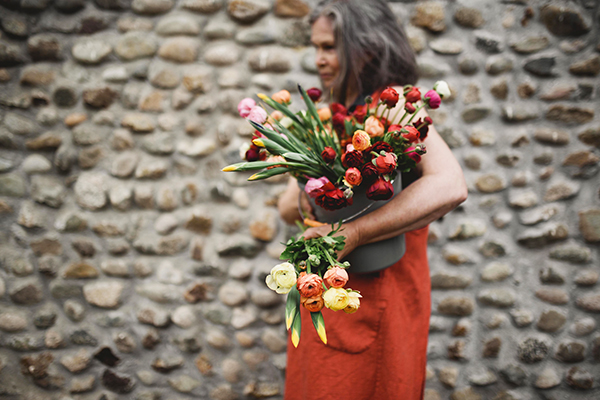 Lorna Jackson started flower farming intensely relatively later in life at Ninebark Farm on a century-old hayfield in Metchosin at the southern tip of Vancouver Island in British Columbia, Canada. Now 64, she plans to continue into her 70s. To keep going, she makes adaptations to ease the toll on her body.
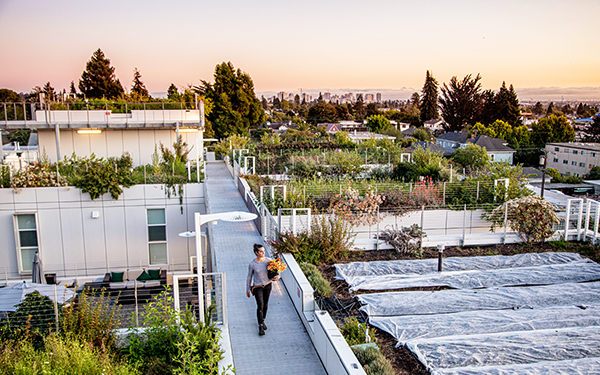 I own and operate Bluma Flower Farm, currently located on a rooftop in downtown Berkeley, California. Going into this year my plan was to try to replicate what I did the year before, one of Bluma’s best years yet. This would have been the first year I didn’t make any big changes. But then the pandemic hit and, of course, like many other businesses, I had to pivot and find ways to survive.
 After spending years working in a corporate environment and managing key performance indicators, I was excited about the prospect of farming without the overhead of data analysis. Gone would be the management by objectives, the need to determine return on investment and other such details on which the corporate world revolves.
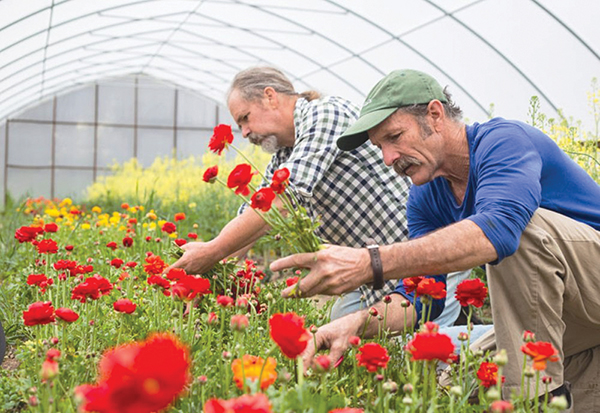 During the COVID era my usual travels have been curtailed. So, I got to thinking about what farms I had visited in the past that I knew pretty well, where a simple phone call could possibly stand-in for a proper on-farm interview and tour. First to my mind was Dripping Springs Garden, an oasis of natural and man-made beauty that is the life’s work of a good friend of mine, Mark Cain, and his farm partner, Michael Crane.
 There are a lot of things we can’t grow in our climate and soil here in zone 4a in Starbuck, Minnesota. But I’m especially envious of some of the woody perennials I see other farmers growing – even at farms just a few hours south of us. As a result, I’m always looking for new woodies to try that are hardy here.


